| December 2005 | |||||||||||||||||||||||||
|
|
|||||||||||||||||||||||||
|
|
Apple’s Final Cut Pro HD 5.0  Final Cut Pro (FCP) nonlinear editing software features a seamless interface with Apple computer systems’ user-friendly hardware more Final Cut Pro (FCP) nonlinear editing software features a seamless interface with Apple computer systems’ user-friendly hardware more |
|
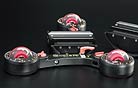
A Versatile Skater Mini  It looks a bit like a ’droid from a sci-fi film, and at first glance it appears too simple, but looks are definitely deceiving more It looks a bit like a ’droid from a sci-fi film, and at first glance it appears too simple, but looks are definitely deceiving more |
|
|||||||||||||||||||||
|
|
|||||||||||||||||||||||||
|
|
|||||||||||||||||||||||||
|
|
Focus Enhancements FS-4  The price of hard drives has now come down enough to be competitive with high-quality videotape more The price of hard drives has now come down enough to be competitive with high-quality videotape more |
|
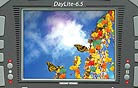
Sunlight Viewable LCD Video Monitors  Wohler Technologies has introduced the Daylite Series, a sunlight-viewable LCD video monitor more Wohler Technologies has introduced the Daylite Series, a sunlight-viewable LCD video monitor more |
|
|||||||||||||||||||||
|
|
|||||||||||||||||||||||||
|
|
|||||||||||||||||||||||||
 |
|
Archives Read and search the New Products and Services archives. go |
|
||||||||||||||||||||||
|
|
|||||||||||||||||||||||||
|
Apple’s Final Cut Pro HD 5.0
|
|
||||||||||||||||||||||||
|
|
|||||||||||||||||||||||||
|
|||||||||||||||||||||||||
|
|
|||||||||||||||||||||||||
|
As opposed to other nonlinear editing systems, especially those that run on a PC platform, FCP is quite literally an “out-of-the-box” working system. For cinematographers looking to do some cutting of their own projects or reels, this is an invaluable tool. The new HD version of FCP certainly holds true to its predecessors’ legacy — out of the box, quickly installed, and you’re up and running, with no need for special hardware and no reconfiguring of system files or drivers. Some of the newest features in FCP 5.0 are the ability to edit native HDV footage, Dynamic RealTime effects playback, and — finally — multi-camera editing support. One of the most highly publicized updates to FCP 5.0 is the ability to edit the new format HDV in its native codec. No intermediate conversion happens, thus simplifying and improving HDV handling considerably. Because I don’t shoot HDV, I was more interested in pushing FCP as far as I could and working with uncompressed 4:2:2 HDCam footage. The “out-of-the-box” concept holds true for everything that can be captured via FireWire. When you bring in HDCam footage, however, the setup gets more complicated. Having become a fan of 24-psf HDCam technology, I was excited to learn that FCP 5.0 could actually work with uncompressed HDCam (instead of recompressing the already slightly compressed HDCam footage). Getting my own G5 to work with HDCam footage was quite an education. First, you need an HD-compatible capture card; I turned to the AJA Kona2 card. Second, standard SATA hard drives are not fast enough to deal with uncompressed HD footage. A high-speed RAID array is necessary to capture and play back uncompressed HDCam. For this, I turned to Medéa Systems and employed the Medéa FCR2/FCR2X Fibre Channel RAID array. The Kona2 needed to be installed, and, of course, the Medéa drive required the installation of a fibre-channel controller. Suddenly, I was back in the PC world of additional hardware and complications. However, once you get those set up, wade through the settings for the Kona2 card and triple-check your settings in FCP, the system works like a charm. I was surprised to learn that HD-SDI connectors also have four channels of embedded audio (much like FireWire). Once I figured this out, I was capturing like a pro. I hooked a Sony J-H3 HDCam VTP (generously provided by Alternative Rentals) via HD-SDI to the Kona2 card, selecting to import 23.98-psf 10-bit 4:2:2 uncompressed HD footage to the Medéa RAID array — and selecting a setting in the User Preferences to ignore time-code breaks (FCP was seeing phantom time-code “breaks”). I captured the footage perfectly. I was amazed to see HDCam footage play back so cleanly. My 23" cinema-display monitor wasn’t big enough to show the whole image at full resolution, which was unfortunate, but I did get close (83 percent), and it looked beautiful. I was able to play five separate uncompressed HDCam video channels at once with no problems at all — very impressive. Of course, rendering takes a while in HD. Applying a 10-pixel-radius Gaussian blur (a notorious render hog) to a 10-second clip took 1 minute 9 seconds to render. In DV, the same filter on the 10-second clip took just under 11 seconds to render. I pushed FCP 5.0 about as far as I could not just with HDCam footage, but also with DV footage. I used the program to edit a documentary feature I’d shot with the Canon XL2 in 24p DV. I had gathered 180 hours of footage, and it was my mandate to have all the footage available for the edit. This required 2TB of hard-drive space that was accomplished with five 400GB FireWire800 drives. During the course of logging the footage, I began to make sub-sequences of subjects that the interviewees were discussing. I ended up with 51 sub-sequences ranging from 10 minutes to three hours, and I often had 15-20 of these sequences open in the timeline simultaneously and was jumping back and forth between them. The edit also incorporated hundreds of still images, many with basic 2-D animation, in addition to multiple video tracks — up to 12 at times. All of this ran nearly flawlessly in FCP 5.0. I ran into a few odd glitches, however. One was incorporating some 12-bit (32kHz) audio media into an otherwise 16-bit (48kHz) project. As FCP recommends, I captured this footage with the proper 12-bit settings and rendered the audio in the timeline, but some of the footage played back through my Panasonic AG-DV2500 deck with a periodic squelch noise. The noise was not in the raw footage, not in the raw QuickTime file, and not heard when playing through the G5. The glitch only happened when playing out through the deck to an external monitor. The glitch did not show up on any exports, and I learned to work around it whenever possible. No matter what I did — including recapturing the footage and re-rendering — I couldn’t get rid of it. This glitch began to expand into other footage somewhat randomly. I’m not sure whether it was a problem with the deck or the software, but it didn’t affect the final export. I also encountered glitches while placing markers in footage, but none of these were detrimental to my work. I must note that I was probably pushing the software beyond its comfort zone by placing nearly 4,000 markers on 180 hours of footage of a single project. Somewhere around the 2,000th marker, I found that if I deleted a marker, the marker would disappear, but the system would still account for it in the marker numbering. If I deleted marker 10, the next would always be 11, and I could never get 10 back for that clip. As with the audio glitch, I learned to work around this. Because I tend to be a bit paranoid about computers and digital files, I always set autosave features to a fairly high frequency and force-save files quite often — generally before any major computational activity, such as rendering. One frustration with FCP’s autosave feature is that it is not intelligent. With such an incredibly large project, the autosave could sometimes take more than a full minute to save the file. When you’re on a roll, this can be very frustrating. It’s even more frustrating when you’ve just waited a minute for a manual save, and two seconds later you are stopped again for autosave. There should be a “smart” feature that autosaves every specified number of minutes after a regular save. Also new in FCP 5.0 is the multi-cam feature. With the recent explosion in reality TV, FCP was losing ground to Avid purely because of the latter’s ability to work with multiple video streams in one timeline. This was cumbersome and challenging to do with previous versions of FCP, but that has now been remedied. With the multi-cam function, you can link up to 128 separate video streams and view the playback of up to 16 at once in real time. In the viewer window, you’ll see these as one, four, nine or 16 separate images; however, you set the viewing preferences. There are several modes of multi-cam editing, including “on-the-fly” cutting, where you can assign various hotkeys to each camera angle, play them all in the timeline, and merely press the corresponding angle’s key to cut to that angle in real time during playback. This works like a live switcher and really helps to get you in the ballpark quickly. Of course, as with most elements of nonlinear-editing systems, these choices are easy to adjust later. One sequence in my documentary featured a group interview shot with three cameras. The multi-cam feature in FCP 5.0 made the editing of this sequence much easier than I’d anticipated. Additionally, this feature can be used in any project — any video or audio media can be linked together to act as a multi-cam clip and be cut quickly on the fly using this feature. The last of the new features in FCP 5.0 is Real-time Dynamic Playback, which is FCP’s answer to real-time rendering. This doesn’t do any actual rendering, but is supposed to allow the user to play back footage in real time. Anytime something needs to be rendered that is not a real-time effect, it plays it back in “draft” quality. As soon as it passes the draft-quality area, it automatically switches playback to full resolution for any real-time effects. This is supposed to make the workflow easier and allow the editor to play back everything in full resolution, except where the system needs to reduce that resolution to present non-real-time effects. I found this feature to be of little help. It could have been a result of the dual 2GHz G5 as opposed to a 2.7Ghz, or the fact that I only had 2.5GB of RAM, but this feature never quite worked for me. I also found that when it did work, I needed to see a much higher-quality image on playback to properly judge an effect. It’s surprising that FCP hasn’t incorporated real real-time rendering by now. Although I wasn’t a fan of Pinnacle Software’s Pinnacle DV, the software was leaps and bounds above FCP in this department; the rendering would automatically happen while you were working. FCP still needs to stop everything to execute a render. Even the “autorender” only happens when the system has been idle for a specified amount of time, and it has to stop any other work to render. This is somewhat handy if you often step away for a cup of coffee and want FCP to work in your absence. If you come back while it is autorendering, however, you must either wait or stop the render in order to keep working. These features strike me as Band-Aids that don’t really solve the problem. FCP needs to incorporate real background rendering to take the software to the next level. Nevertheless, the ability to work with uncompressed HD footage firmly places FCP 5.0 in the “Pro” realm. Final Cut Pro Studio lists for $1,299. The software suite includes DVD Studio Pro 4, Motion 2 and Soundtrack Pro. This test was carried out on: PowerMac G5 Dual 2GHz with 2.5GB RAM, OS 10.3.9, AJA Kona2 capture card (installed on 133mHz PCI slot), and a Medéa FCR2X Fibre Channel 1.8TB RAID array. |
|
||||||||||||||||||||||||
|
|
|||||||||||||||||||||||||
| links:
www.apple.com/finalcutstudio |
|
|
|||||||||||||||||||||||
|
|
|||||||||||||||||||||||||
|
|
|||||||||||||||||||||||||
|
A Versatile Skater Mini
|
|
||||||||||||||||||||||||
|
|
|||||||||||||||||||||||||
|
|||||||||||||||||||||||||
|
|
|||||||||||||||||||||||||
|
Rarely have I found a camera platform smaller than, say, the Fisher 11 that works as well as its big brothers and sisters. Generally, the smaller and more simplistic the dolly, the more limited the moves that it can accomplish. This does not hold true for an ingenious little device called the Skater Mini from P+S Technik. The Skater looks a bit like a ’droid from a science-fiction film, and at first glance it appears too simple to be really useful, but looks are definitely deceiving. The Skater works on three skateboard-style wheels positioned in a triangulated formation, with the axle position of each wheel being fully adjustable 360° on a finely calibrated scale that surrounds the wheel. By adjusting the three wheels (labeled A, B and C) to varying degrees, you can make the Skater roll in a straight line, execute curved moves around a fixed point, or spin on its own center axis to act as a low-profile pan head. The calibration ring around the three wheels is marked in single-degree increments from 0 to 180 on both a “positive” scale, and a “negative” scale. There are also two other marks on the wheel: when all three wheels are set to position “O,” the Skater revolves on its own center point; when they are set to position “L,” they are turned in such a way as to lock the Skater in position, making it a stationary platform. Each wheel has its own “direction blocking” knob that secures the setting in place during operation. The “head” of the Skater incorporates a 20° rocker plate with a built-in standard dovetail sliding plate (which can be removed if using other mounting hardware). The rocker plate can tilt the camera +⁄- 20°, depending on the magazine placement on the camera. The high magazine on the Arri 435, for example, does not impede the tilting, but the rear-seated magazine on an Arricam LT might interfere with upward tilting. An optional 30° rocker plate can be quickly exchanged for higher degree of tilt, if necessary. Also, the 30° plate raises the mounting position by almost an inch if a bit more height is needed. The Skater is extremely low profile — only 2" from ground to the camera base with the 20° rocker plate and dovetail in place, and 2.8" with the 30°. Originally designed for tabletop photography, the Skater excels at rotating around a fixed center point. With the Skater Mini, a full 360° rotation around a fixed point no longer necessitates a time-consuming rig. Instead, you do some quick calculations, set the three wheels and shoot. I tested the Skater while photographing some computer components for background graphic plates. I started with an internal modem, standing it on edge (supported by a C-stand arm) and positioned the Skater about 1' away from the component. I wanted a shot that circled around the board, and, following the instructions, I tried the “roughing it in” mode. On each wheel’s calibrated ring are two metal pegs that represent the exact centerline perpendicular to the wheel’s axle. If you line these pegs up on all three wheels toward the object you want to rotate around, you will have a rough setting for making circular moves. The rotation worked wonderfully. I could completely circle the board several times, and it took less than a minute to set the wheels — and I was working alone. The center point for the circular move was not exactly the center point of the modem board, so after a couple of takes, the Skater drifted off its mark. The Skater instructions are quick to point out that although you can rough in the settings, precise calculations are far better, and P+S Technik makes such calculations extremely easy by giving you several options. One step beyond the “eyeball” rough setting, the Skater has an optional laser-pointer attachment that fits perfectly on the two metal pegs that mark the center point of each wheel’s axle. When you position the laser pointer on the wheel’s calibrated ring pegs and then point the laser at the object you wish to circle around, it aligns the wheels much more precisely. This is great for the “A” and “B” wheels, but not so much for the “C” wheel, which is often blocked by the camera body. If you can’t get a clean line of sight from “C,” you move up in the precise-setting food chain to the calculators. P+S Technik provides a number of methods for making more precise calculations from a handy reference card that features a number of preset distances (in increments of 5cm or 5") and the precise settings of each wheel (down to 1⁄10 of a degree, even though the rings are only marked for each whole degree). If the handy chart isn’t working for you, P+S Technik offers two downloadable calculators, one for Microsoft Excel and one for PDA devices. With these two simple pieces of software, you enter the distance from the object to the reference mark on the Skater, and you get precise settings for the three wheels. It doesn’t get any easier than that. The Skater is incredibly smooth. Even while using a macro lens on an old hardwood floor, I was able to execute smooth moves. I have just three criticisms of the Skater. First, at an extremely close distance to the modem board and an extremely shallow depth of field, even trying the most precise settings I could, I found that after six or seven takes, the Skater drifted between 1⁄8" and 1⁄4" off its mark. Granted, this might be because I wasn’t working from the best surface. Nevertheless, no matter how hard I tried to make precision settings (guessing how to set 1⁄10 of a degree between two marks set about 1mm apart), I couldn’t get it precise enough to avoid the slight drift. Second, although the Skater provides a significant degree of tilt, tilting is not really possible in shot. There is no drag on the rocker plate, but perhaps a tiny tilt arm could be snapped into place to help when a bit of tilt is necessary; this would have been nice for a couple of shots. Third, because the Skater is so versatile and can make large moves, it’s difficult to find an adequate position to operate the camera from the eyepiece. Lacking an onboard monitor, I was doing a bit of guesswork and double-checking after the fact to make sure I was maintaining the composition I wanted. However, without making the Skater about 10 times larger than it is now, I don’t see a solution for this. I therefore suggest that anyone working with the Skater add an external monitor to the package. In all, I found the Skater to be fun, quick, intuitive and extremely versatile — handy for much more than tabletop shots. Weighing just 8.38 pounds and measuring 17.2"x15.2", it can be easily transported by one person. The dolly can handle cameras up to 66 pounds and can be operated by one person. P+S Technik notes that the Mini is not intended to replace its big brothers and sisters. Rather, it’s intended to work alongside them, and it does that with flying colors. For more information, visit www.pstechnik.de or call (49) 89-45-09-82-30. In the U.S., contact ZGC, (973) 335-4460, www.zgc.com. |
|
||||||||||||||||||||||||
|
|
|||||||||||||||||||||||||
| links:
International: www.pstechnik.de United States: www.zgc.com |
|
|
|||||||||||||||||||||||
|
|
|||||||||||||||||||||||||
|
|
|||||||||||||||||||||||||
|
Focus Enhancements FS-4
|
|
||||||||||||||||||||||||
|
|
|||||||||||||||||||||||||
|
|||||||||||||||||||||||||
|
|
|||||||||||||||||||||||||
|
I recently had an opportunity to test the Focus Enhancements FS-4 Portable Direct-to-Edit Recorder while shooting with multiple Canon XL2s in 24p DV for a documentary. My main reservation with a direct-to-disk workflow concerns archiving. I believe wholeheartedly in archiving every piece of footage shot, especially in light of the current DVD supplement craze. But with direct-to-disk, what is being stored for archival purposes? Am I putting a whole stack of hard drives into storage and praying that I can access the data in 10 years? Digital technology moves fast, and each new format too often leaves its predecessors in the dust. That said, when I received the FS-4 and read through the manual, I was elated to learn that it can record in four-channel 12-bit (32kHz) audio. With the odd configuration of sound inputs on the XL2, I was forced to use 4-channel audio, as my interviews would be done with a one-man crew. Audio was to be recorded with wireless lavalieres, but I had no backup audio and had to resort to the on-camera microphone as backup. Because of XL2’s configuration, the only way to use the on-camera mike in addition to an XLR input in the rear of the camera is in four-channel 12-bit mode. The FS-4’s ability to record in this manner natively would save me a considerable amount of time in post. Unfortunately, I did not have a chance to test this feature and its compatibility with my setup before going into the field to shoot. I was working on an extremely tight deadline and editing with Apple Final Cut Pro 5.0 HD. Via FireWire, FCP can handle only two audio channels at a time, which means capture time must double for four-channel 12-bit recording. With the FS-4, the idea that I didn’t have to double my capture time was extremely appealing; it had the potential of knocking an expected four days of capture down to two. Even better, the FS-4 records DV in native nonlinear editing formats, eliminating the need for capturing at all! You can hook the FS-4 directly to the computer and have immediate access to the clips in your desired NLE software. I was transferring QuickTime files from the FS-4 to a larger-capacity hard drive that would connect directly to the Apple G5 for editing. With FireWire400 I/O on the FS-4, files are transferred at 400Mbps, which cut down a real-time capture of one hour per “tape” to about 10 minutes. In theory, this meant I could take my 40 hours of capturing and cut it down to a mere three hours or so. That would be impressive. Alas, it did not work out quite that well. Although the FS-4 can record in four-channel 12-bit audio, the files are not compatible with Final Cut Pro 5.0 HD. FireStore told me the FS-4 was not yet compatible with any HD versions of NLE software. This means the FS-4 is not wholly compatible with the latest two versions of the both product leaders in NLE software, Final Cut Pro and Avid. Unfortunately, when I tried the FS-4 with FCP 3.0, I couldn’t access channels 3 and 4 at all — they seemed to not exist. I tried the FS-4 with Avid Xpress DV 3.5, but it doesn’t record in the Avid OMF format. (The FS-4 Pro does, but I was not working with the Pro model.) According to the manual, Focus’ Web site has an up-to-date list of applications compatible with the FS-4, but I found no such information. Four-channel audio conundrum aside, when the FS-4 worked, it worked like a charm. The speed at which I could access clips recorded on the drive was astounding. The FS-4 connects simply into the FireWire port on the camera. You still can record footage to tape simultaneously, which is extremely important for “non-believers” like me, and you can even slave the FS-4 so that the record button on the camera starts and stops both units together — that is, if you can set the FS-4 correctly. The interface is clunky and sometimes counterintuitive. Compared to today’s LCD screens, this one seems to be about five years behind the loop. It has large, easy-to-read text, but because it is so large the commands have to be drastically abbreviated. As a result, you must know the FS-4 inside and out before you can start working with it. What does LCD1 mean again? FA AV/C? Even after I’d worked with the FS-4 for a week straight, some of these features and menu selections continued to confuse me. The button controls are not intuitive at all. You use “right” and “left” keys to scroll through the menus, but then it seems rather arbitrary as to whether you use “select,” “down,” “left” or “right” to make a choice. Sometimes there is a tick mark by the current choice, but that is not necessarily the active selection. You must press the “down” button to get to the active one. In some menus, when you hit “select,” you get kicked back to the main screen — you have to scroll back to make sure the selection was made. Indeed, my biggest problem with the FS-4 was that it seemed to randomly revert to its default settings. Every time I used it, I had to triple-check the settings to make sure they were where I wanted them. And even with my triple-checking, almost half of the footage I recorded with the FS-4 was laid down in RawDV, not my desired QuickTime. Even more confusing, when in sync mode, the “stop” button does not stop the recorder. You must use the “right” button to get it out of Pause mode. Seem confusing? It certainly was. The cadence of connections and selections is also rather esoteric. It often took me seven or eight tries to get the FS-4 to lock into Sync mode with the Canon (so that the “record” button on the camera would also start the FS-4 recording). I needed to have the FS-4 on, have both devices connected, and then turn on the XL2 to get it to sync properly. This was the only definitive way I got the FS-4 to recognize and sync with the camera. Sync was very important, because it was the only method that would display the time code from the XL2. That way, when I hit record, I saw identical time code rolling on the FS-4 and XL2 and was assured that a solid connection had been made and information was being laid down on the drive. When the settings were right, the FS-4 worked like a dream. It does cut extended clips into multiple clips of about 9 minutes maximum due to the 2GB file size limitation of the FAT32 file system, but it seamlessly links between them so that playback is not interrupted. I was able to connect directly between the FireWire port and the Apple G5 and immediately start editing in FCP HD. The limited capacity of the FS-4 became a bit of a problem. I was shooting interviews, each of which ran 60-90 minutes, and I filled the FS-4 40GB drive with just two interviews. I then had to dump those files to a larger hard drive, which took about half an hour, before resuming the shoot. There is an 80GB version of the FS-4, and you can hook two units together to work consecutively to give you 160GB, or about 12 hours of constant recording, but I did not have multiple units to test out this feature. Even though the unit is light and has a wonderfully slim battery, it’s a bit bulky, especially for a 40GB hard drive. With today’s technology, it would be nice to have an FS-4 about the size of an iPod. The FS-4 is FireWire400 only. Transfer times could be cut in half with the 800Mbps speeds of FireWire800. The FS-4 can natively record Raw DV, AVI Type 1, AVI Type 2, Canopus AVI, Matrox AVI, QuickTime, QuickTime 24p, and 24p AVI Type 2. The FS-4 Pro can natively record in Pinnacle AVI and Avid OMF. The unit is very quiet. When I put my ear directly to it, I could hear a fan, but it’s quieter than the tape drives of most DV cameras. Cleaning up the FS-4 after transferring the data is no quick task. Because it records a new clip every time you start and stop the recording, there can be dozens of clips and subclips created for long takes (about seven subclips for each continuous hour of recording) stored on the drive. Each has to be deleted individually. This is an incredibly tedious and time-consuming process, and a “delete all” option would simplify this considerably. Aside from the interface problems, the FS-4 worked well. The ability to record redundantly to tape and hard drive did much to make me comfortable with the technology. Focus Enhancements states that the FS-4 and FS-4 Pro are designed particularly for videographers working on weddings, live events, corporate and industrial productions, and I would agree with them. At this time, its applications for independent features are limited. If the interface is improved, file capacity increased and physical size decreased, it could become a popular tool for those shooting DV projects. The FireStore FS-4 also has a GPI & RS-232C Control jack. It is powered from 15V DC (7.5W) and has a removable Li-ion battery pack that lasts about 90 minutes. The unit is 1.59"x5.6"x3.74" and weighs less than 1 pound. It records in 25Mbps 8-bit 4:1:1 (NTSC-DV) or 4:2:0 (PAL-DV) video with DV embedded time code (drop or non-drop). The internal disk is a 40GB (or 80GB FS-4 Pro), 5,400 rpm, 8MB cache, FAT32 format hard drive and is compatible with Windows 98SE, ME, 2000, XP and Mac OS9 and 10. For more information, visit www.focusinfo.com/products/firestore/fs-4.htm, or call (408) 370-9963. |
|
||||||||||||||||||||||||
|
|
|||||||||||||||||||||||||
| links:
www.focusinfo.com/products/firestore/fs-4.htm |
|
|
|||||||||||||||||||||||
|
|
|||||||||||||||||||||||||
|
|
|||||||||||||||||||||||||
|
Sunlight Viewable LCD Video Monitors
|
|
||||||||||||||||||||||||
|
|
|||||||||||||||||||||||||
|
|||||||||||||||||||||||||
|
|
|||||||||||||||||||||||||
|
Daylite LCD panels are modified to exacting parameters to give exceptionally clear picture quality in all sunlight conditions. Backlighting is made more efficient, a precision lens is bonded to the front of the assembly to eliminate glare, and a new generation of control electronics aimed at professional users has been developed. All Daylite panels are RGB active-matrix TFT types with fast response times so that moving video and multimedia presentations are properly produced. The Daylite Series is available in 6.5" and 10.4", and there are rugged models that come with hard waterproof cases. The monitors feature SDI, composite and S-video inputs, SVGA or UXGA data input. They work in PAL and NTSC in 4x3 and 16x9 aspect ratios. (2x1 features an underscan mode.) They have a 500:1 contrast ratio and operate in 12V AC or DC configurations. For more information, visit Wohler Technologies online at www.wohler.com or call (650) 589-5676. |
|
||||||||||||||||||||||||
|
|
|||||||||||||||||||||||||
| links:
www.wohler.com |
|
|
|||||||||||||||||||||||
|
|
|||||||||||||||||||||||||
|
|
|
|
|
|
|
|
|
|
|
|
|||||||||||||||


|
|
||
|
|
 |
|
|
|
||
|
|
 |
|
|
|
||
|
|
 |
|
|
|
||