Lens Test: The Deakinizers
Jay Holben and cinematographer Kaity Williams test Otto Nemenz International's Deakinizer optics, which evoke the feeling of early still-photo portraiture lenses.

By Kaity Williams
All images courtesy of Kaity Williams and Jay Holben except where noted.
Not too long ago, cinematographer Kaity Williams invited me to participate in a test of the “Deakinizer” lenses — something I hadn’t even heard of before. She told me about her experience with them and showed me some early test results, and I was extremely excited to get my hands on these optics, and to see for myself what they are and how they work. Here, Williams shares her recollections of our test and our findings.
— Jay Holben
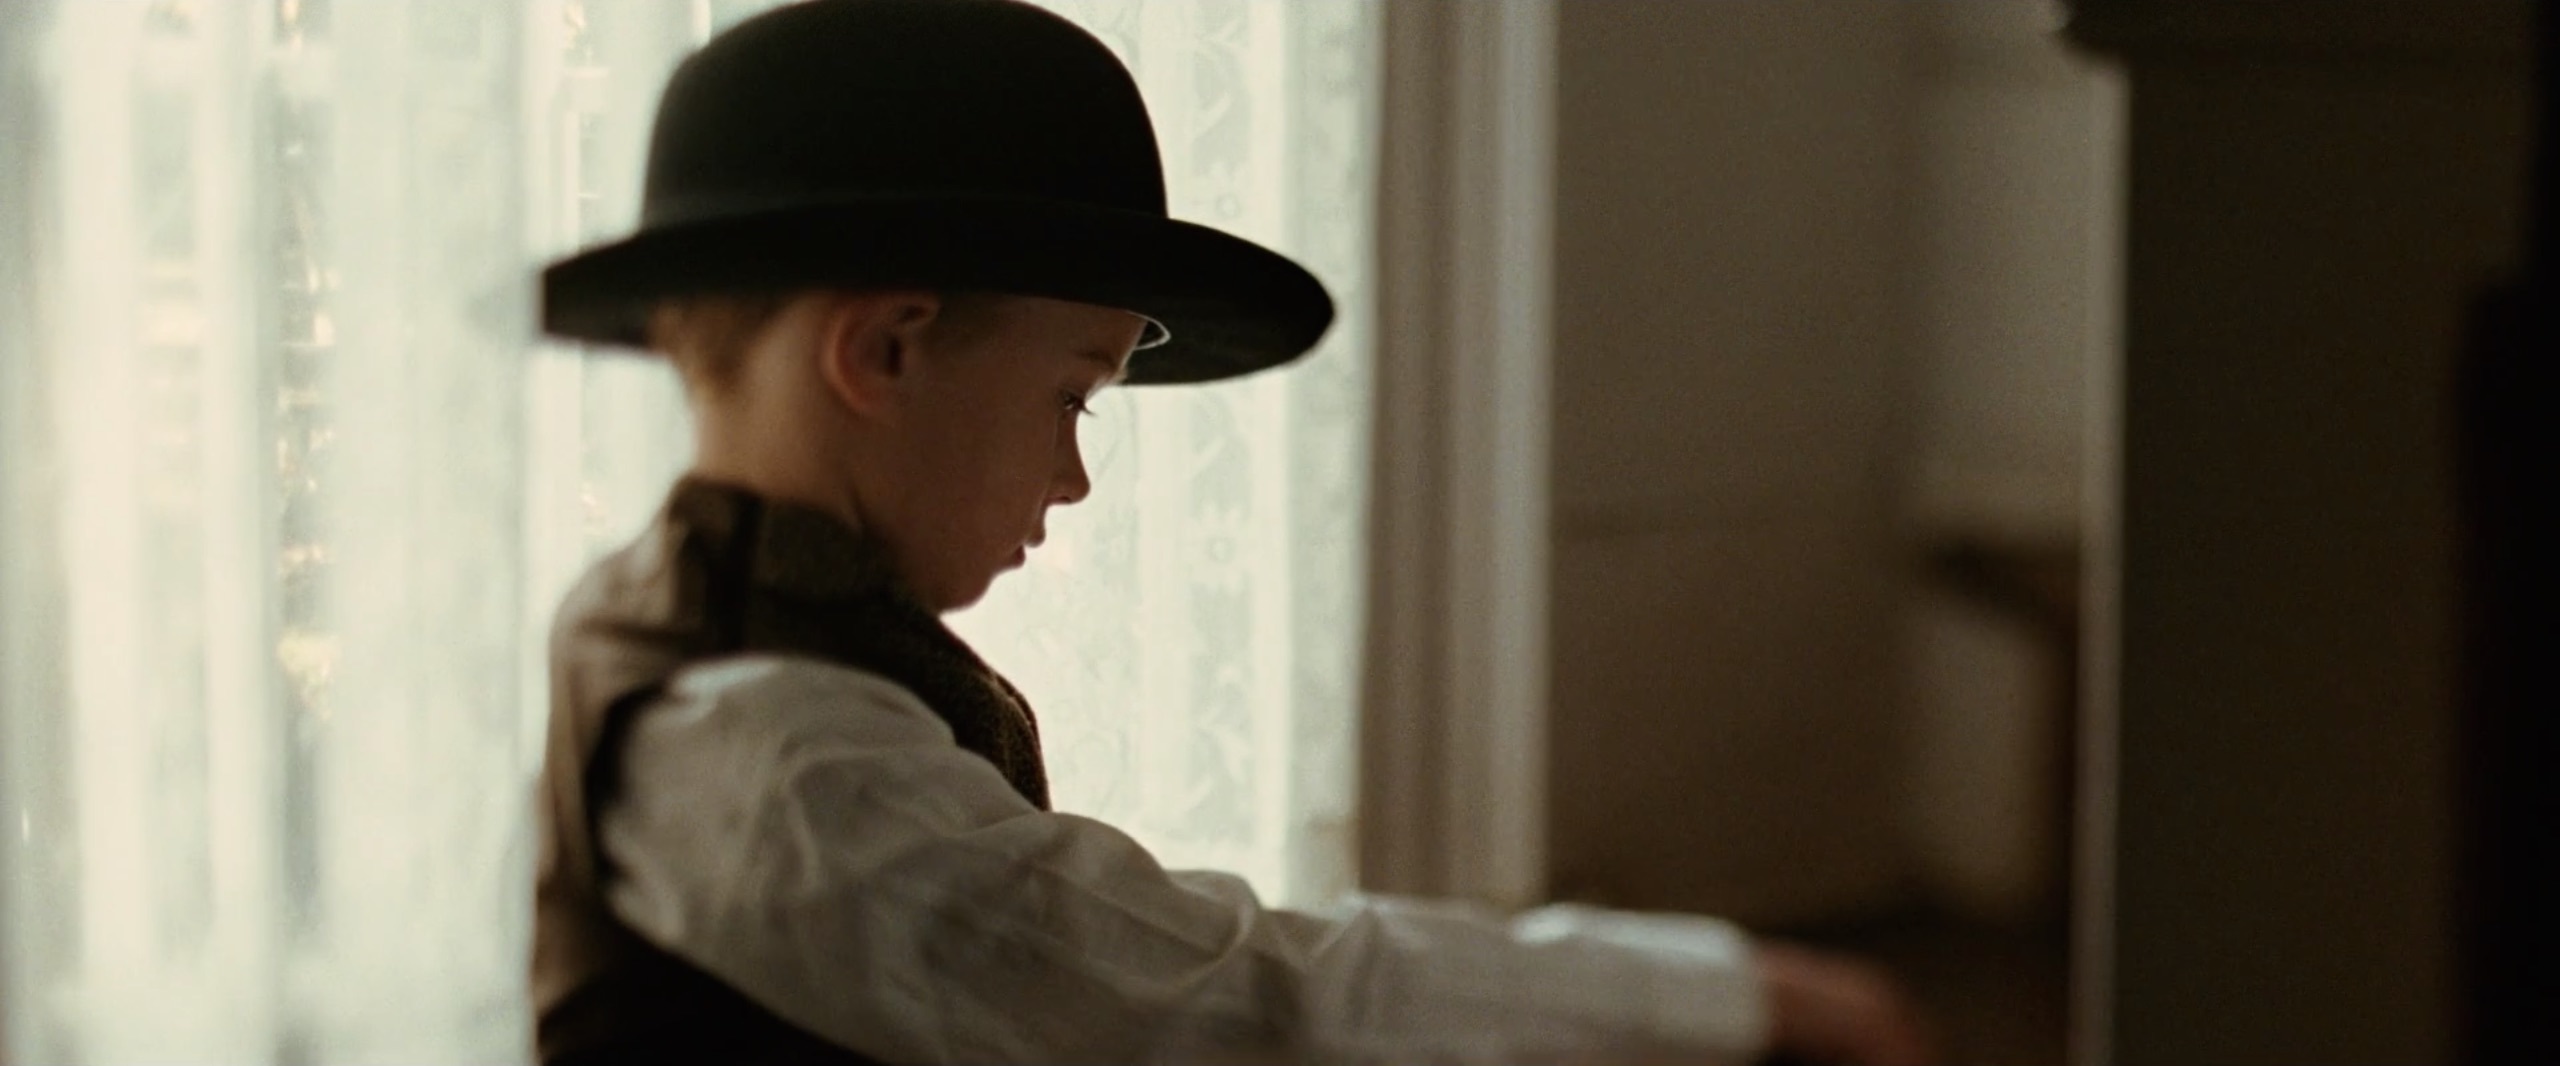
Cinematographers have a very special job: to stimulate an audience’s emotions through the use of composition, lighting and lenses. Once they’ve developed an understanding of the tools of the trade, they can start to physically manipulate those tools to create even more ways of evoking emotions. To that end, directors of photography often seek out specialized tools to create a particular effect. For example, Roger Deakins, ASC, BSC turned to Dan Lopez and Steve Hamerski at Otto Nemenz International to customize a special set of lenses and elements for use on The Assassination of Jesse James by the Coward Robert Ford (AC Oct. ’07). The cinematographer was looking to evoke the feeling of a “vintage” early photographic portrait lens for the period film. The resulting optics — which created a dreamlike image with a clear center and blurry, “smeared” edges — were dubbed the “Deakinizer” lenses.
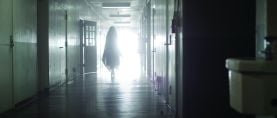
I first became interested in these lenses when I was on a long journey home to Los Angeles from New Orleans, and I decided to watch the film. What better way to pass the time than by studying a master’s work? I kept noticing these fascinating images — a series of them in the beginning as the narrator explains the life of Jesse James (played by Brad Pitt), and as the film continues, the same stylized look is typically used for transitions. I wanted to know how the cinematographer achieved the effect, and my research led me to Deakins’ own website, where he discussed the Deakinizers.
The director of Jesse James, Andrew Dominik, had seen an old photograph that inspired this visual style — akin to the look achieved with a Petzval portrait lens from the 1800s — and Deakins began to experiment with ways to imitate it. He came into Otto Nemenz with a normal 50mm lens and a small single optical element that he would hold in front of it to emulate the look. He demonstrated the effect for Lopez and Hamerski and asked if they could suggest something that would re-create it.
They took a wide-angle Kinoptik lens and removed an element. As Deakins explained to AC in the October ’07 issue, the removal of that element “makes the lens faster, and it also gives you this wonderful vignetting and slight color diffraction around the edges.” The cinematographer asked for additional focal lengths, so Lopez and Hamerski scoured their inventory and tested several configurations before finally suggesting a combination of Arri Macro primes and various single-element attachments.
Soon after, I was at another rental house testing optics for a narrative project. Thinking about a dream sequence in the story, I asked if the rental house had any optics that might create an effect similar to that of the Deakinizer. We ended up with a custom-tuned lens, with a similar attachment, but we weren’t quite able to achieve the same dreamlike effect.
A few months later, I met Alisa Shamosh, a marketing and sales executive at Otto Nemenz, who invited me to tour the Hollywood rental house. There, I was able to see the actual Deakinizer lenses and attachments, which are available to rent.
I first tried Deakinizer #1, the modified wide-angle Kinoptik; physically, it looked like a normal lens, except that an element had been removed. It required no special attachment, and it produced that enhanced/dreamy effect with heavily blurred edges. Fascinatingly, with the element in question removed, the Kinoptic was now more of a 44.5mm focal length.
Deakinizer #2, #2A and #3 are all frontal single-element attachments that pair with a taking lens — an Arri 32mm (T2.1) Automatic Exposure Compensating Macro, an Arri 50mm (T3) Automatic Exposure Compensating Macro, or an Arri/Zeiss 60mm (T3) Macro to achieve different focal lengths and looks.
The attachments are held in place in front of the lens either with a swing-tilt mechanism that allows adjustments side to side, up and down, forward and back, and by tilting vertically and horizontally, or with a bellows adjustment. There are specific combinations of the elements and primes that have to be followed for the effect to work; a cheat sheet comes in the lens case.
It was an honor to be able to get hands-on experience with these special optics. In person, I was amazed at how much fine-tuning could be done to achieve a specific look. I looked at each Deakinizer that day and took home some frame grabs from the quick test for further study.
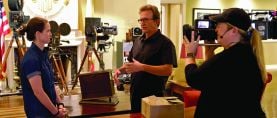
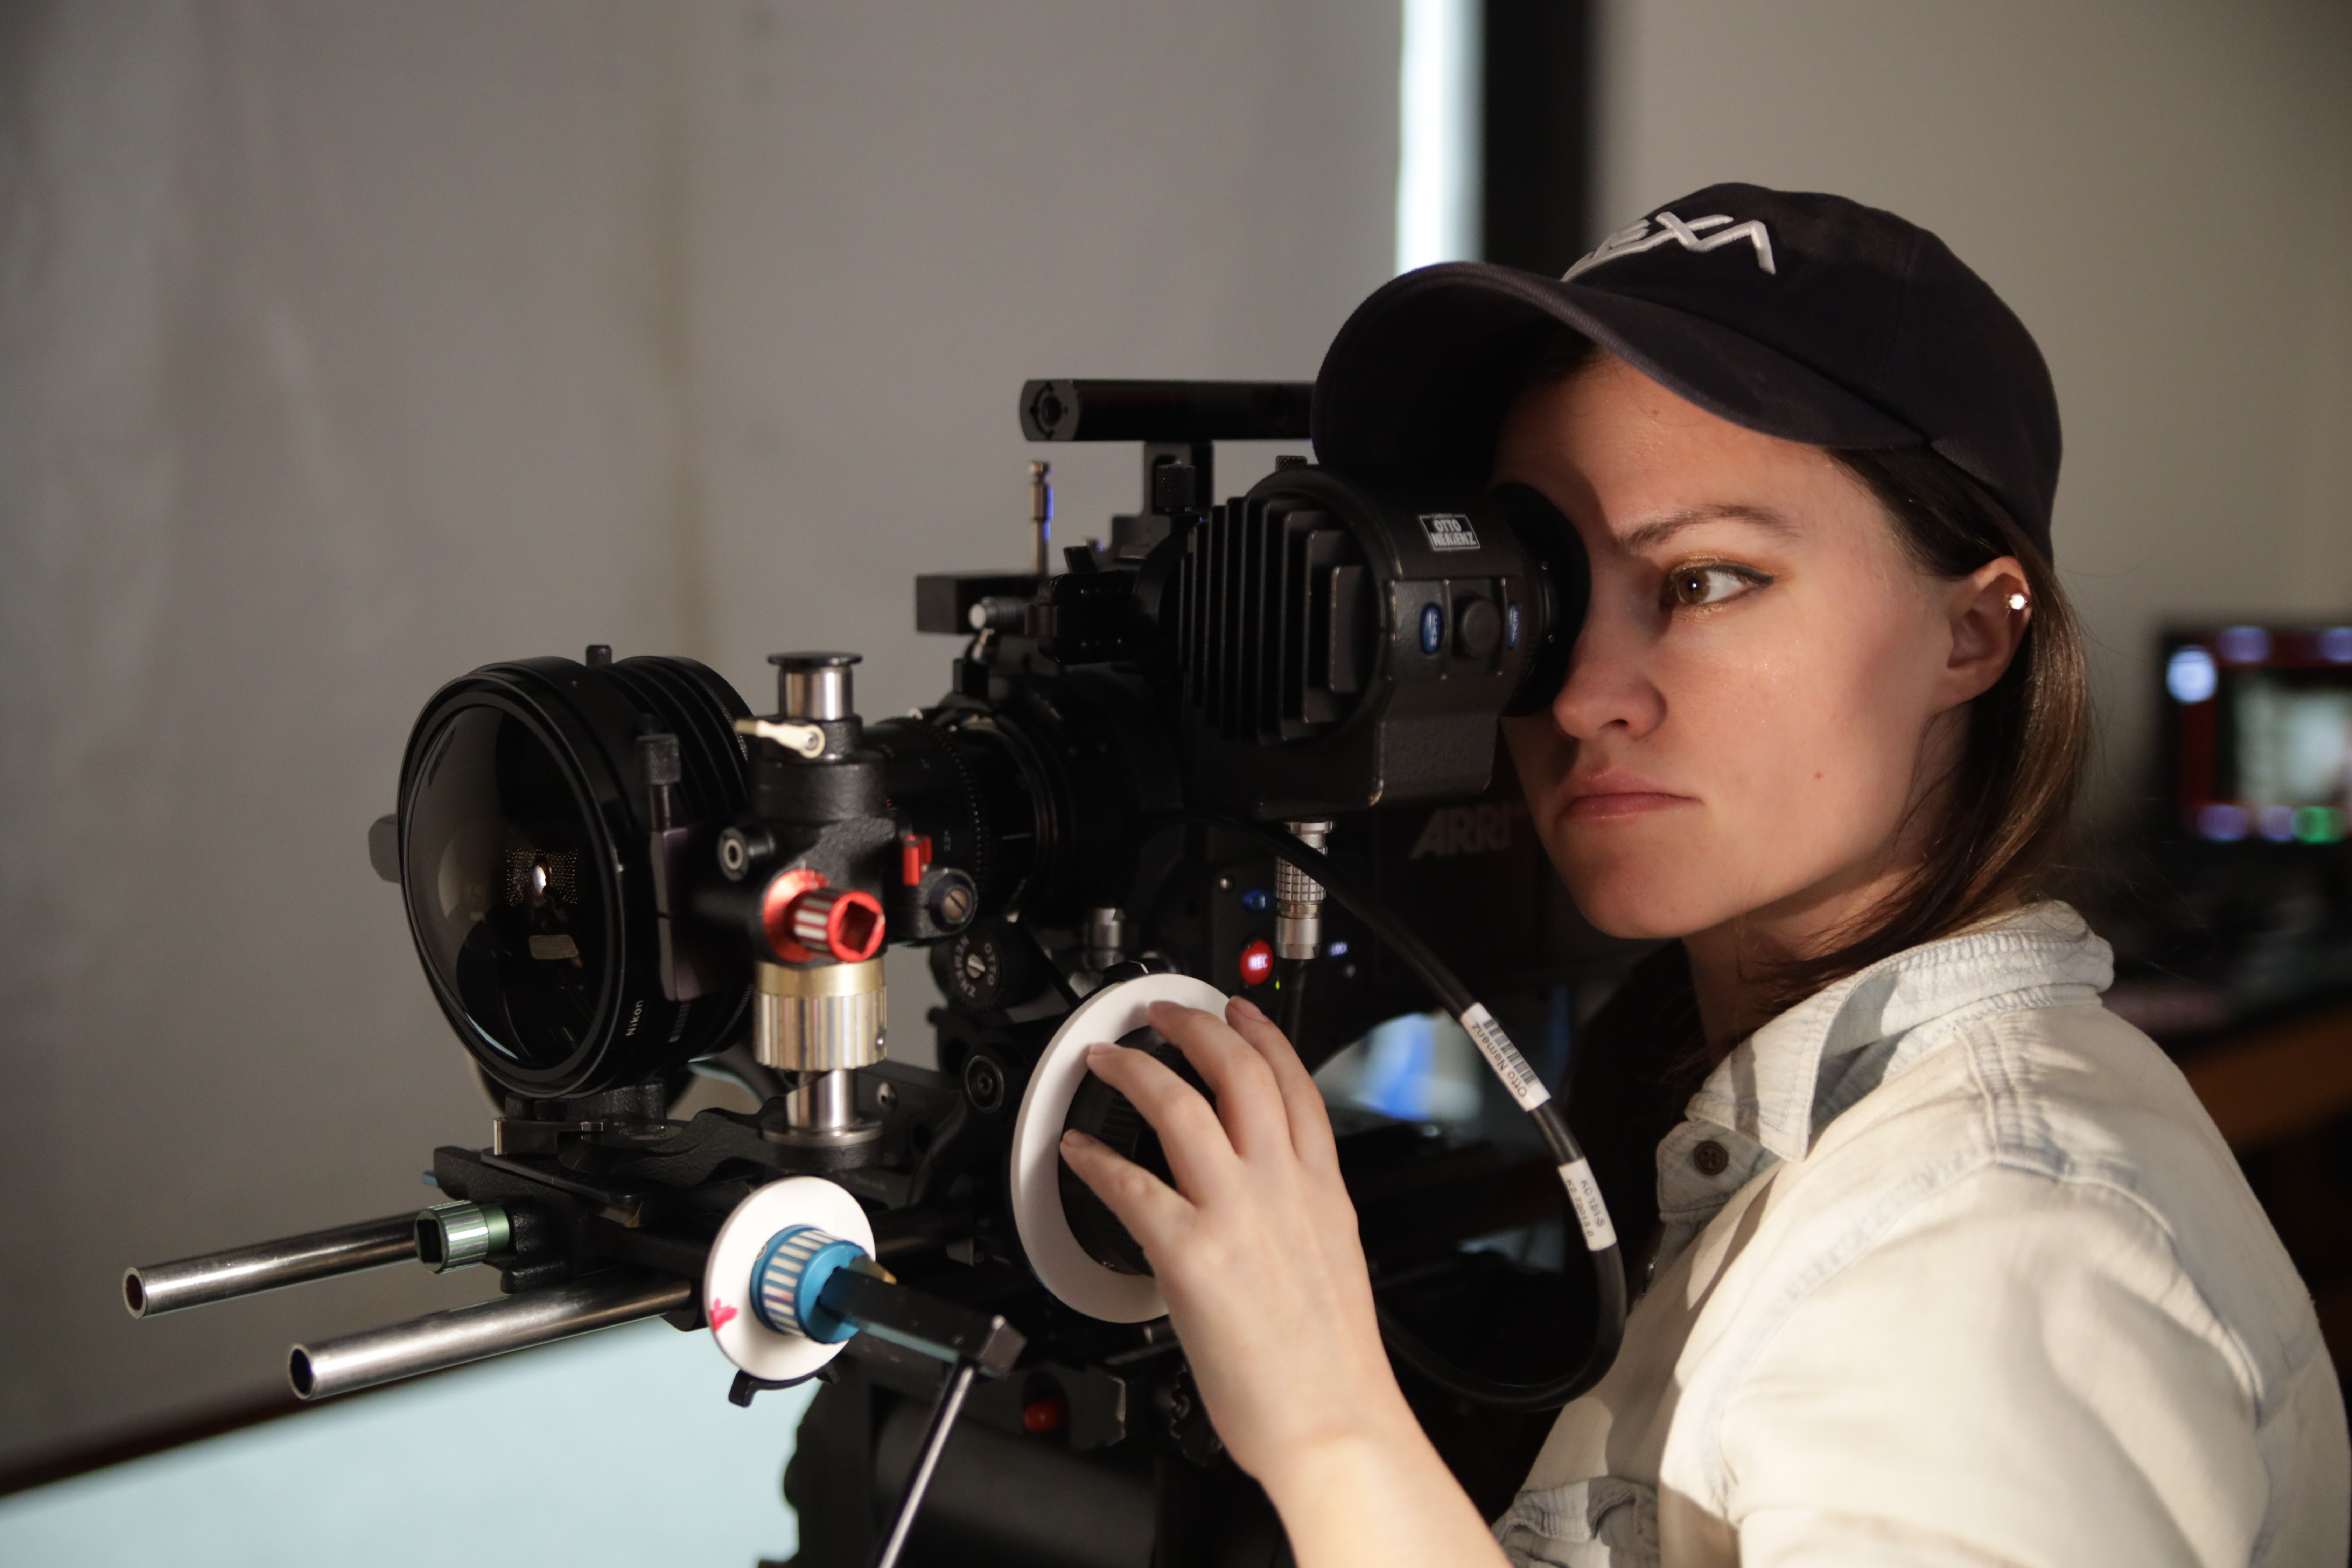
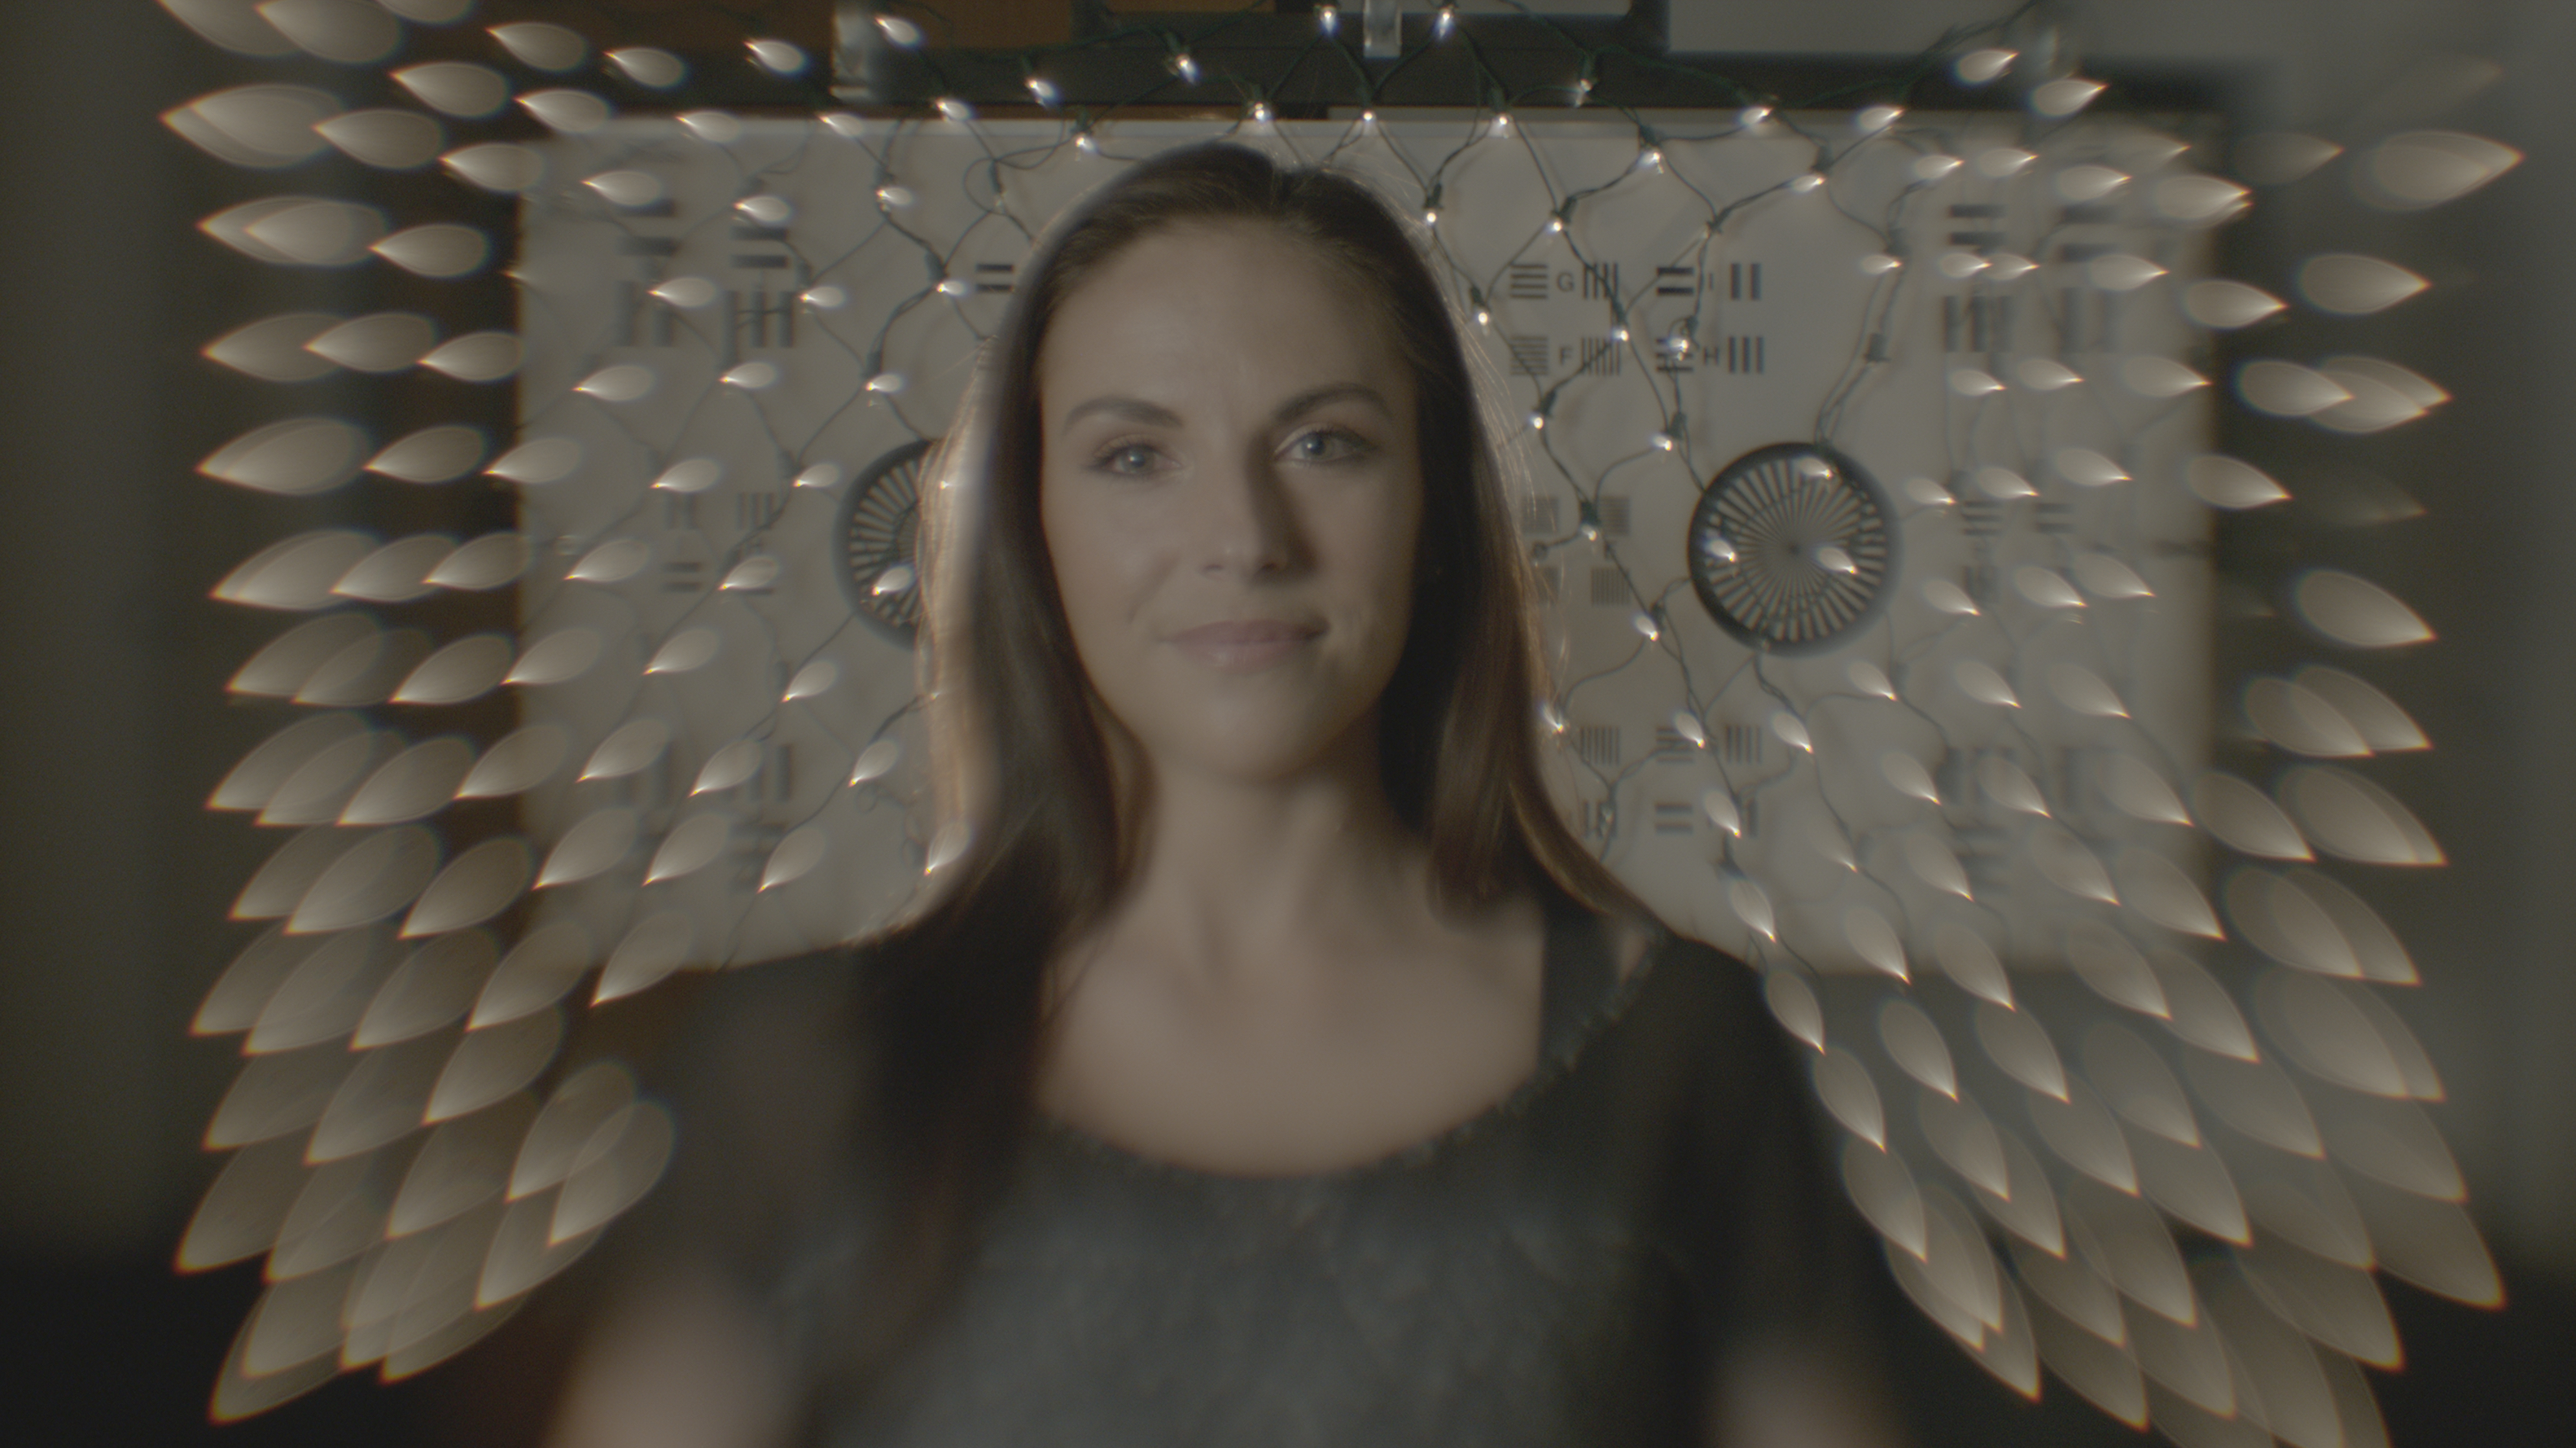
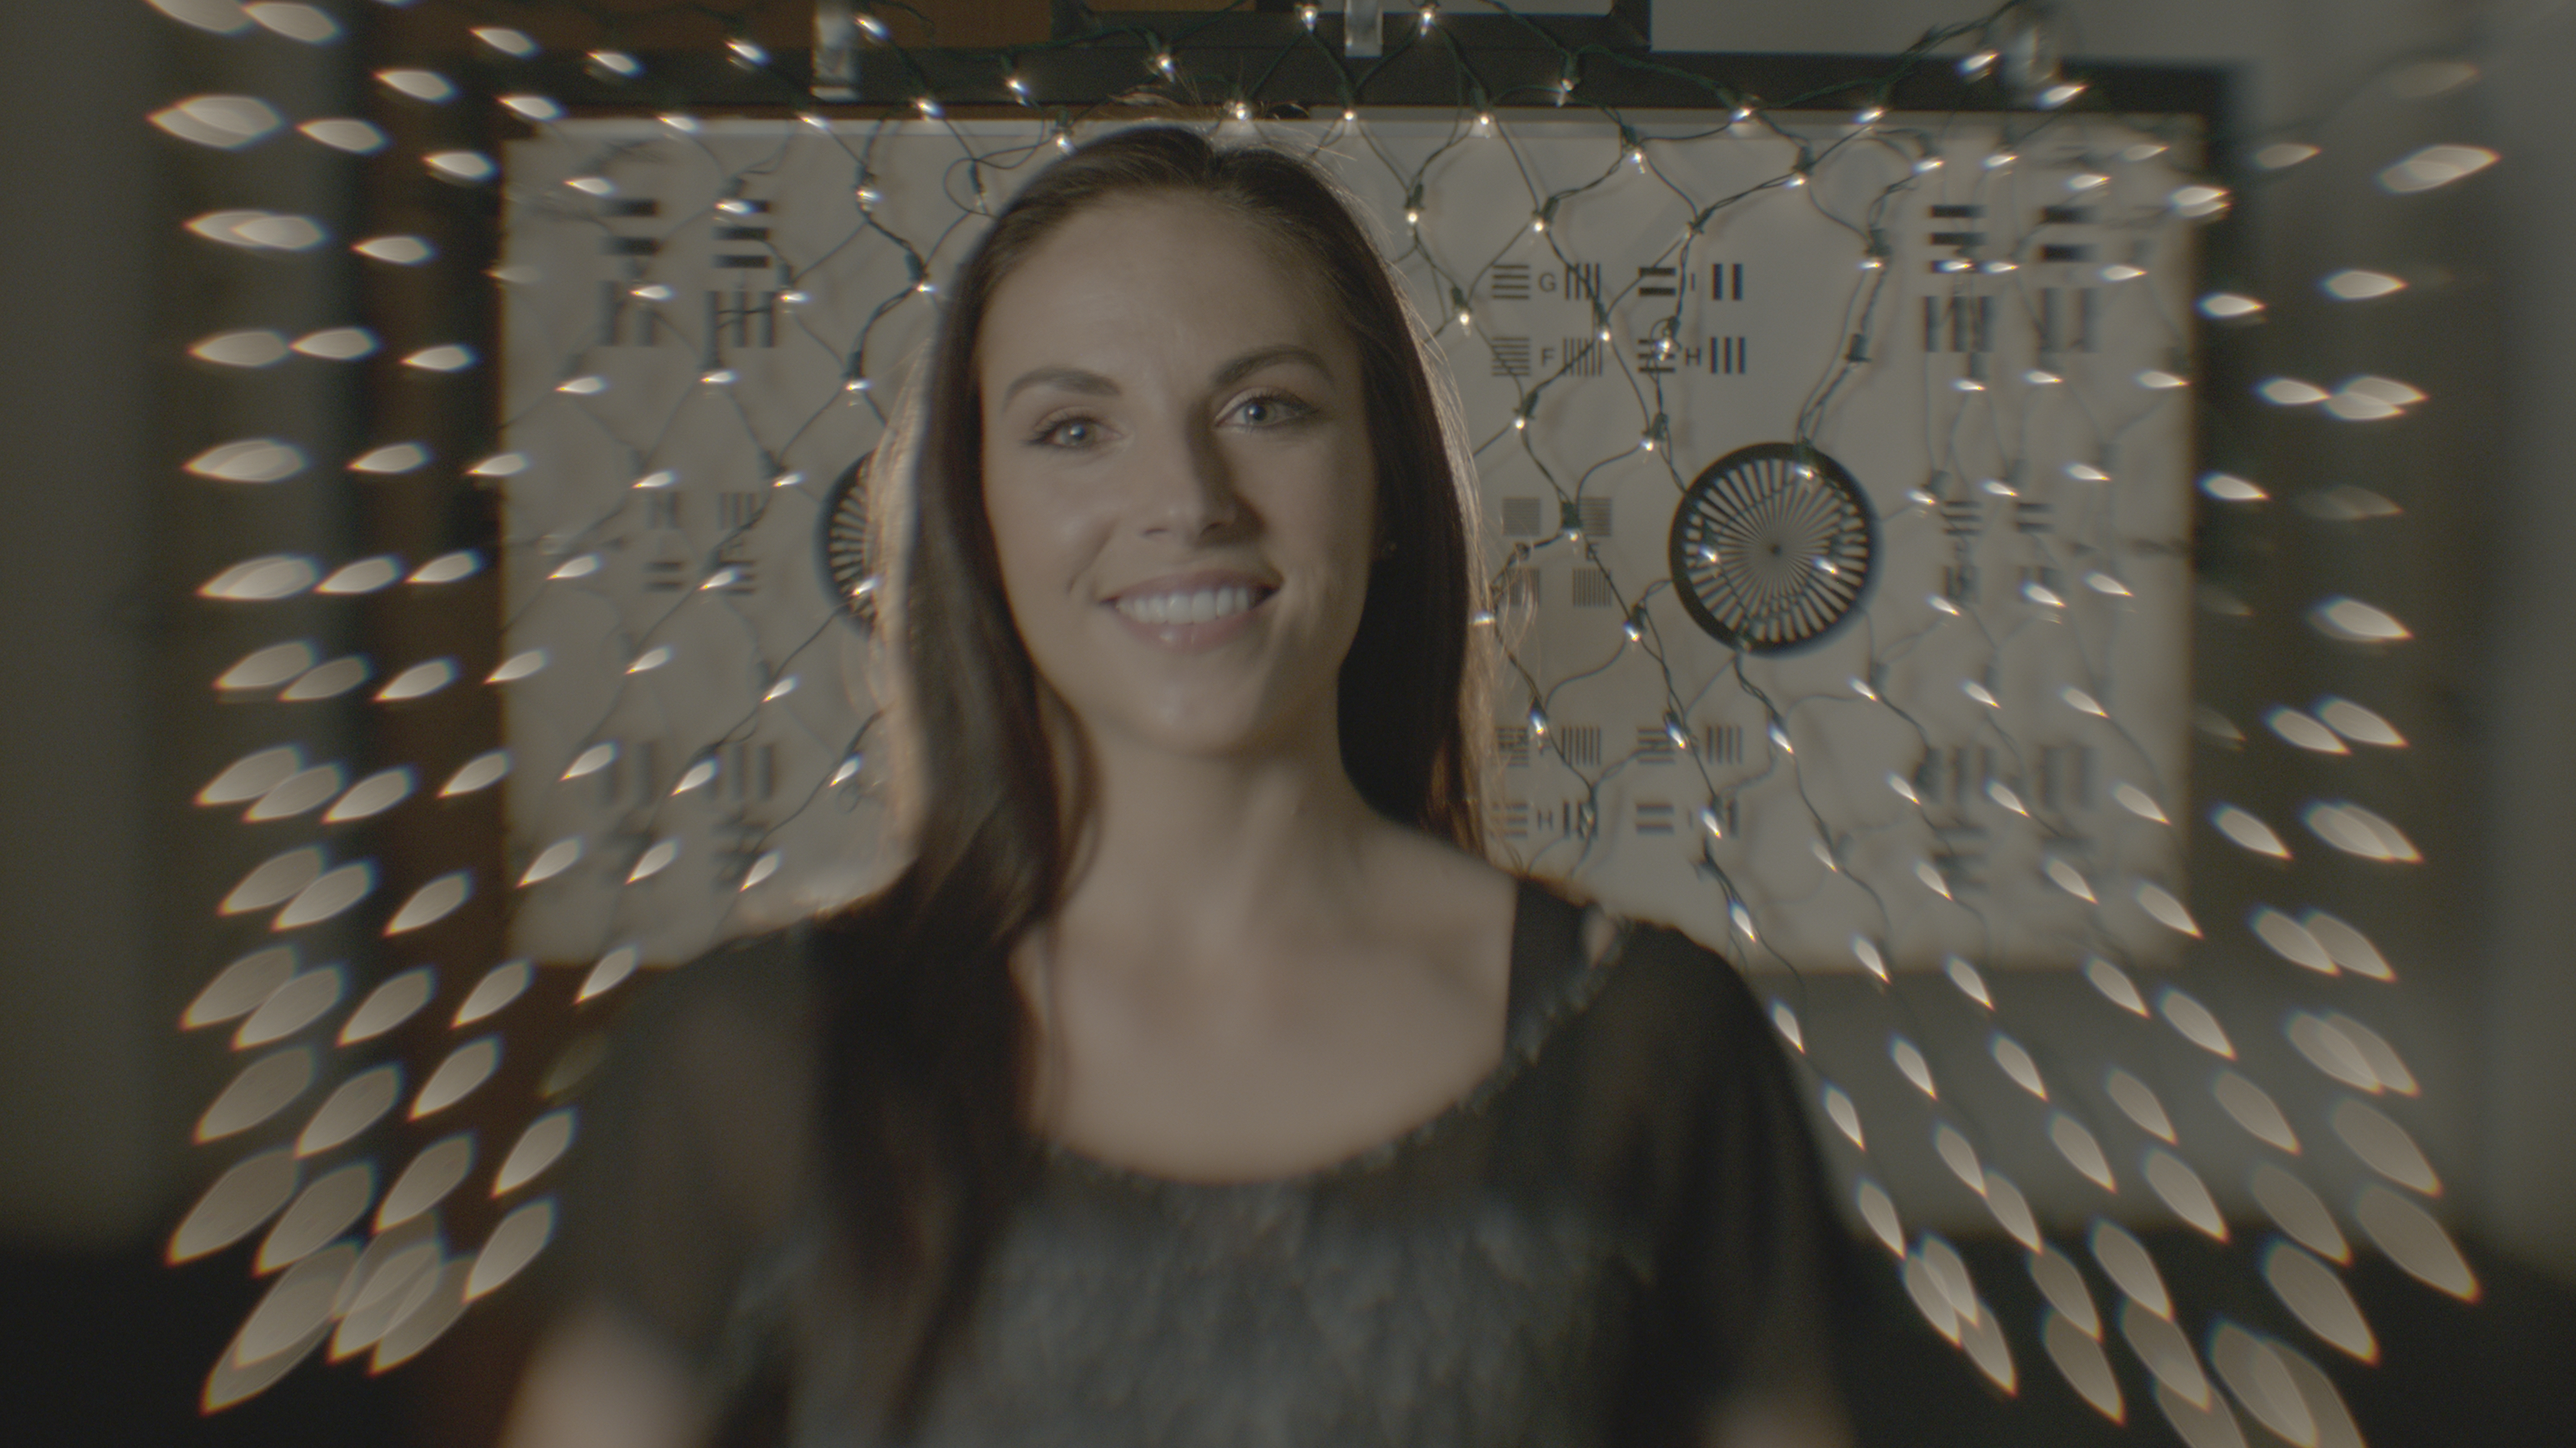
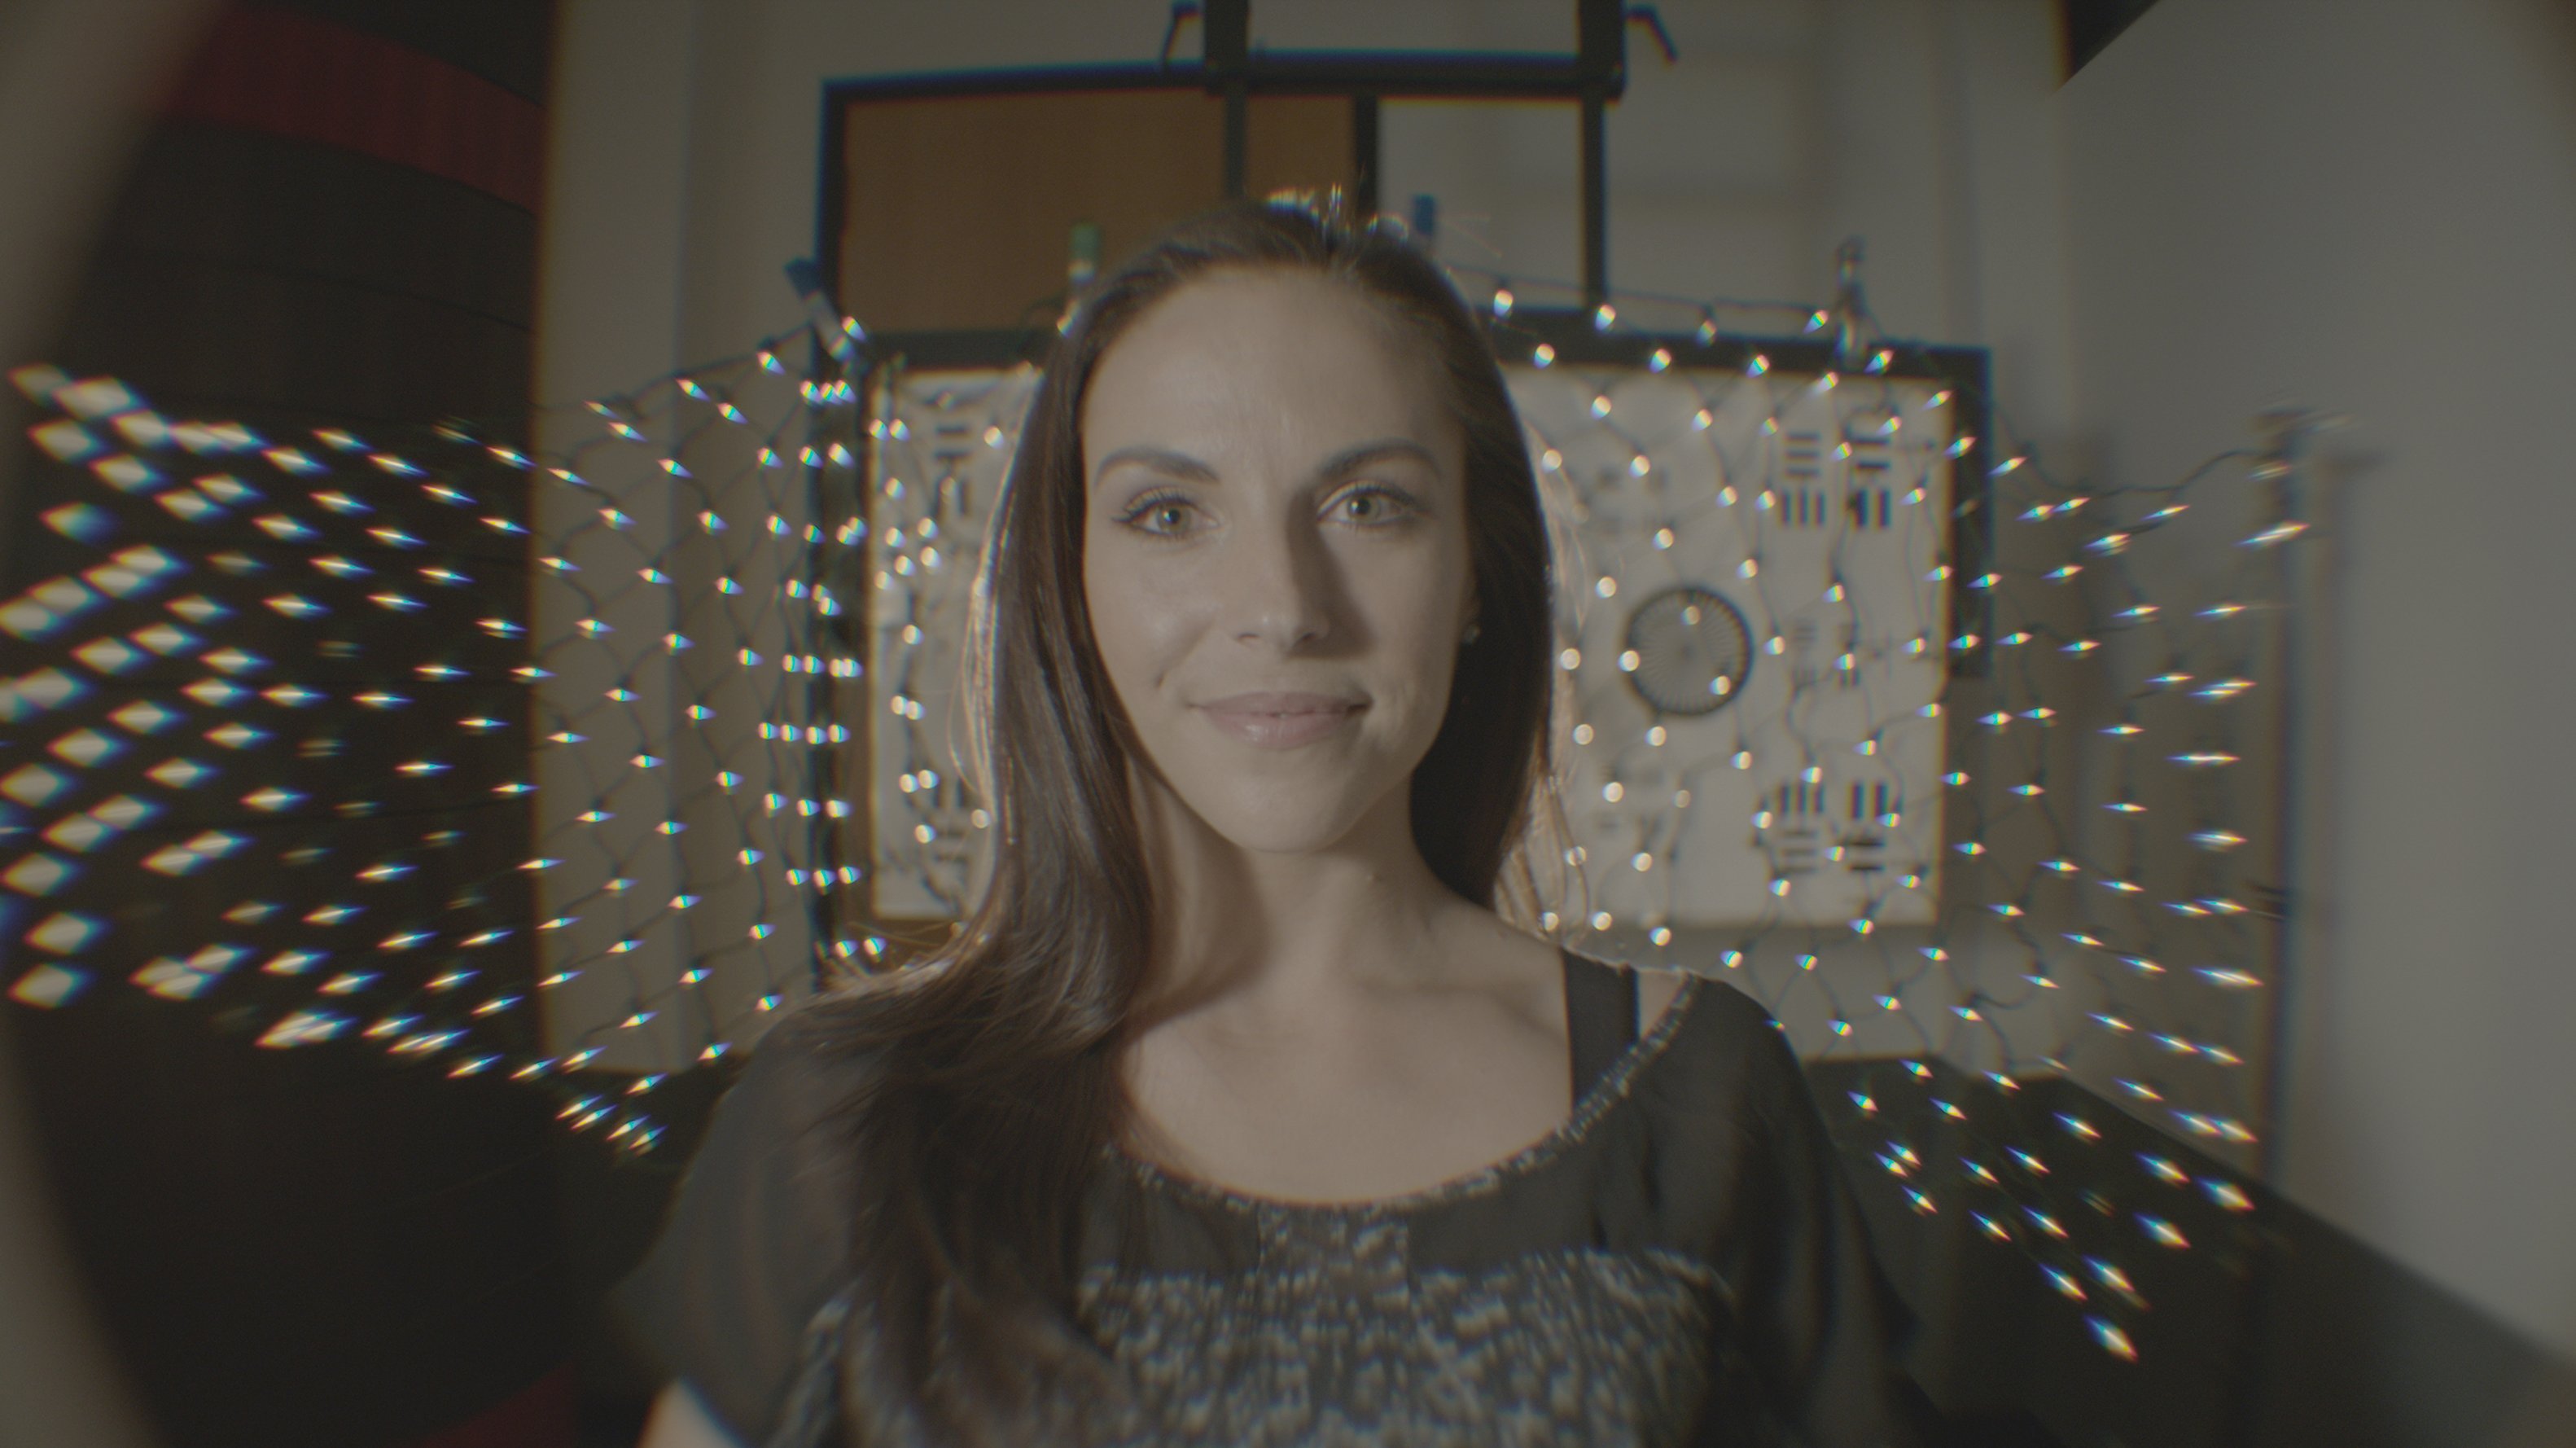
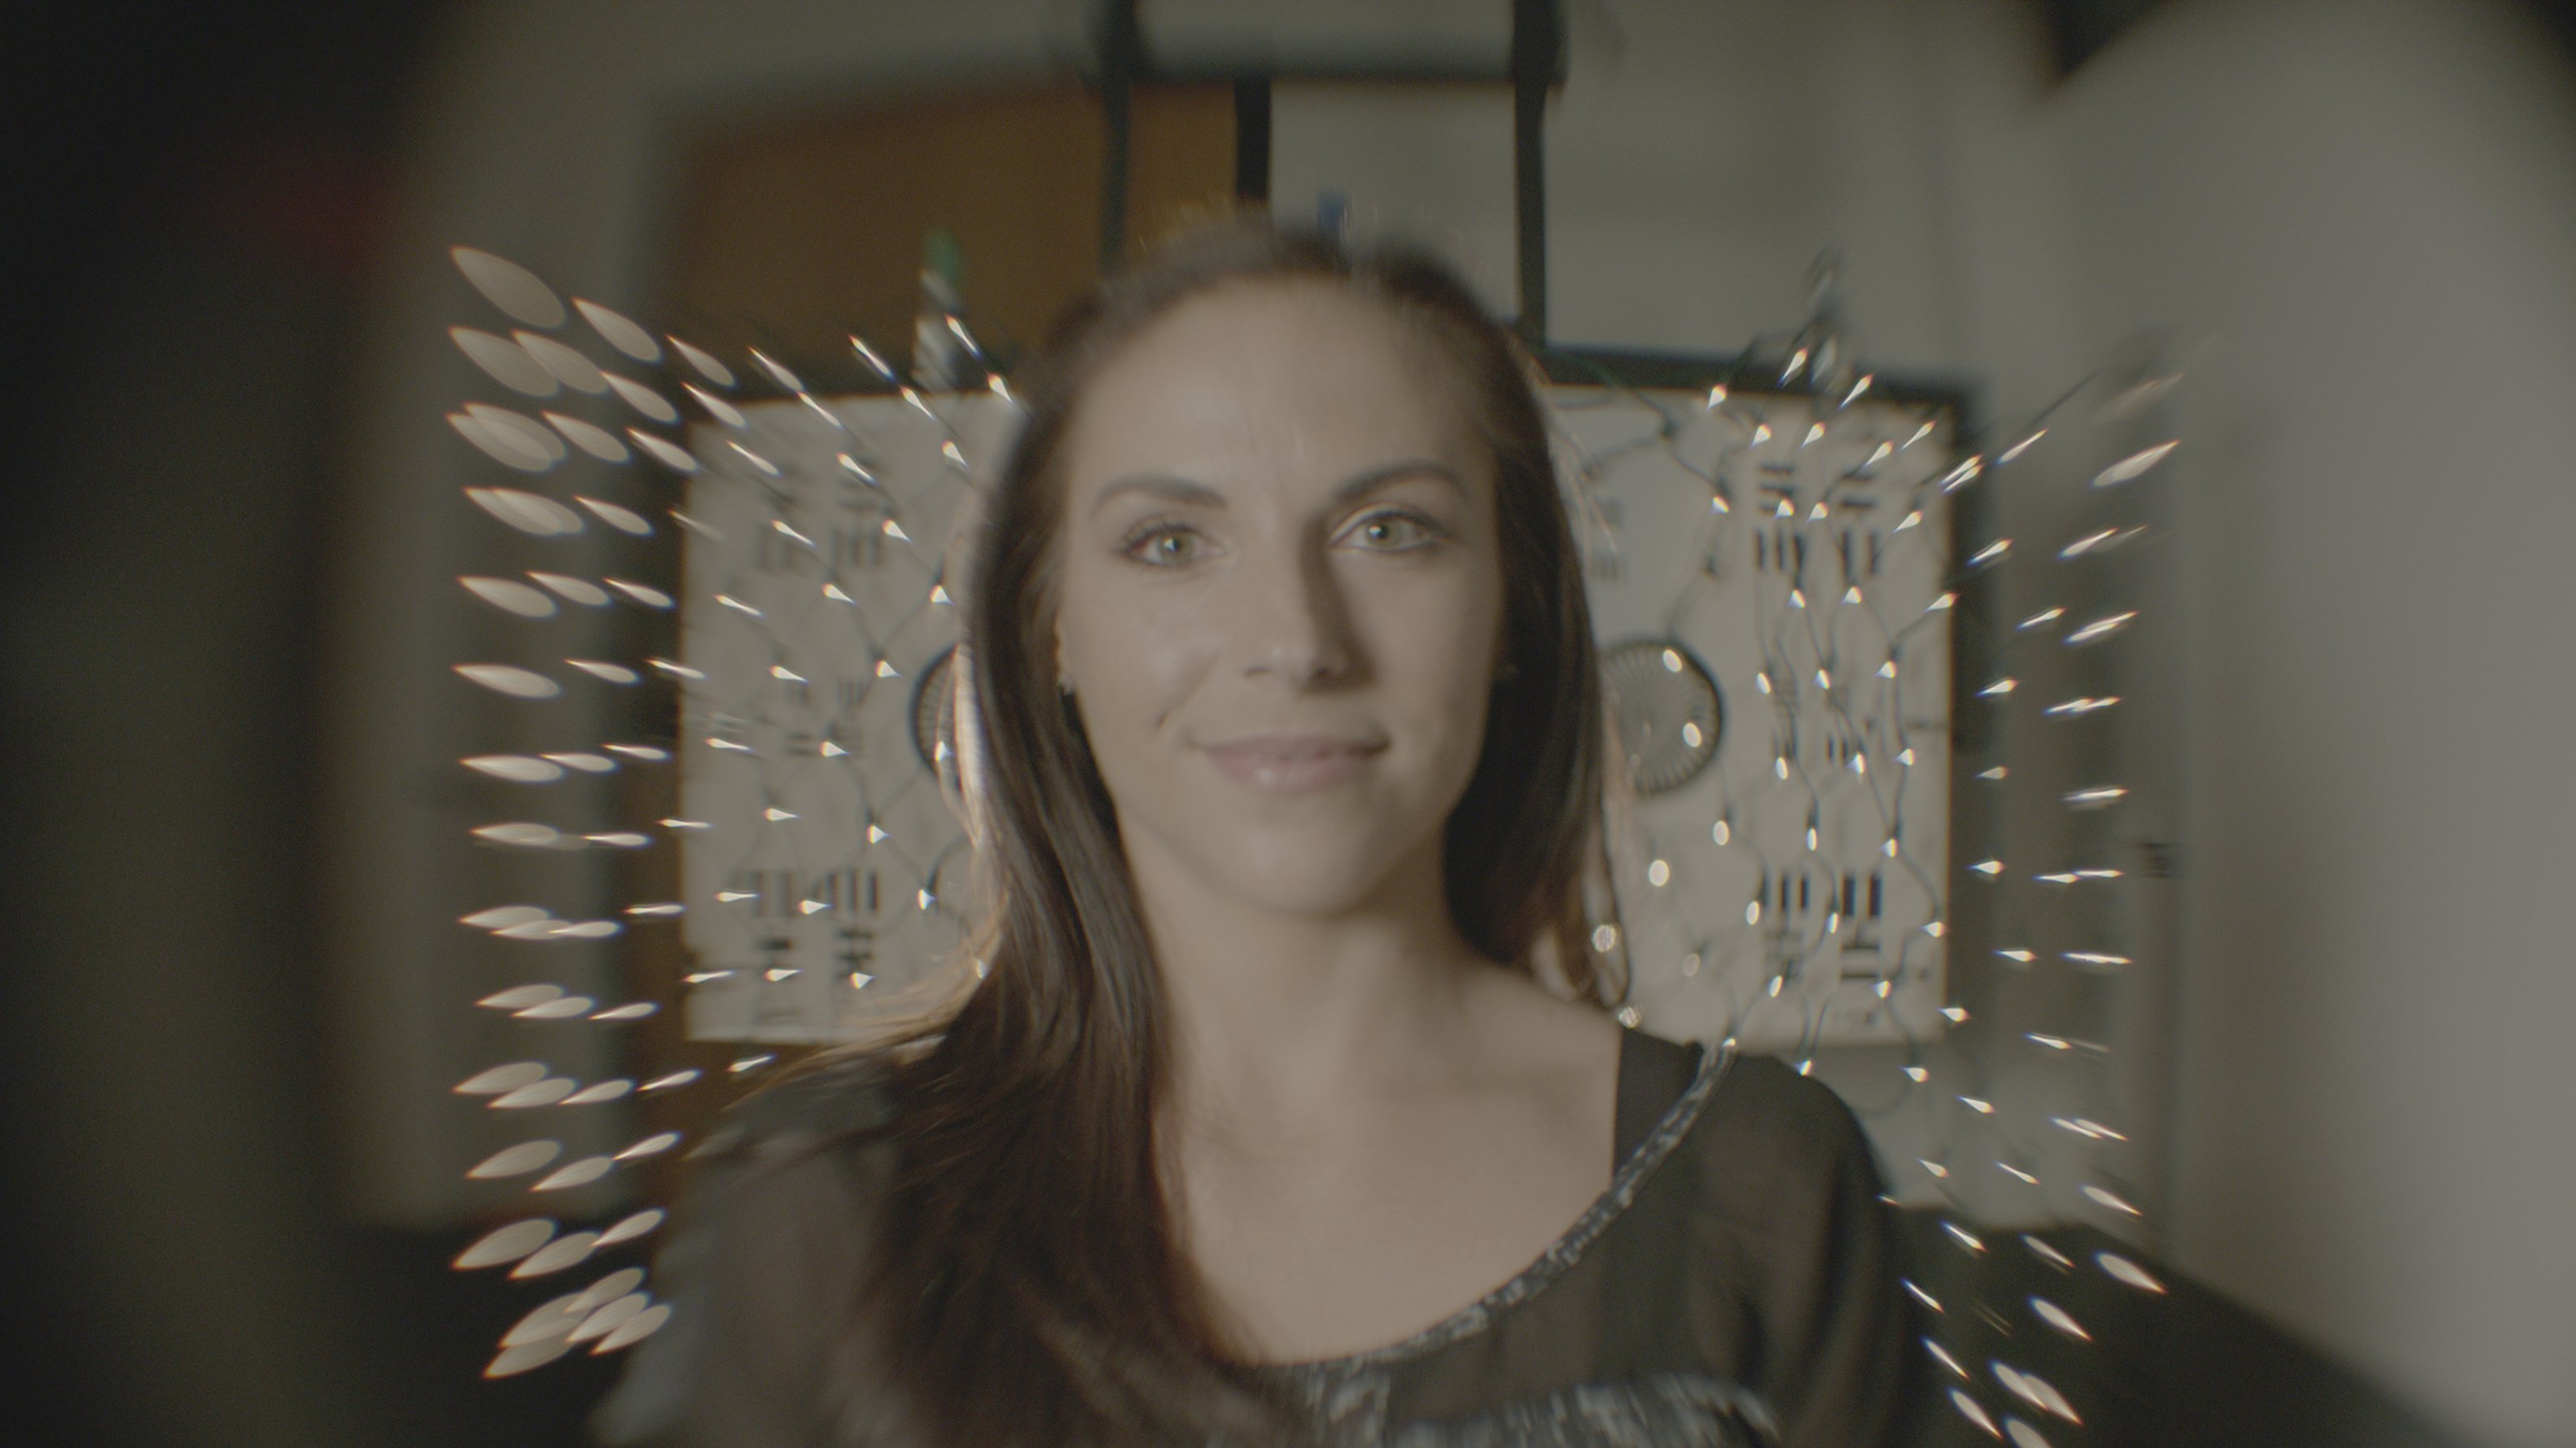
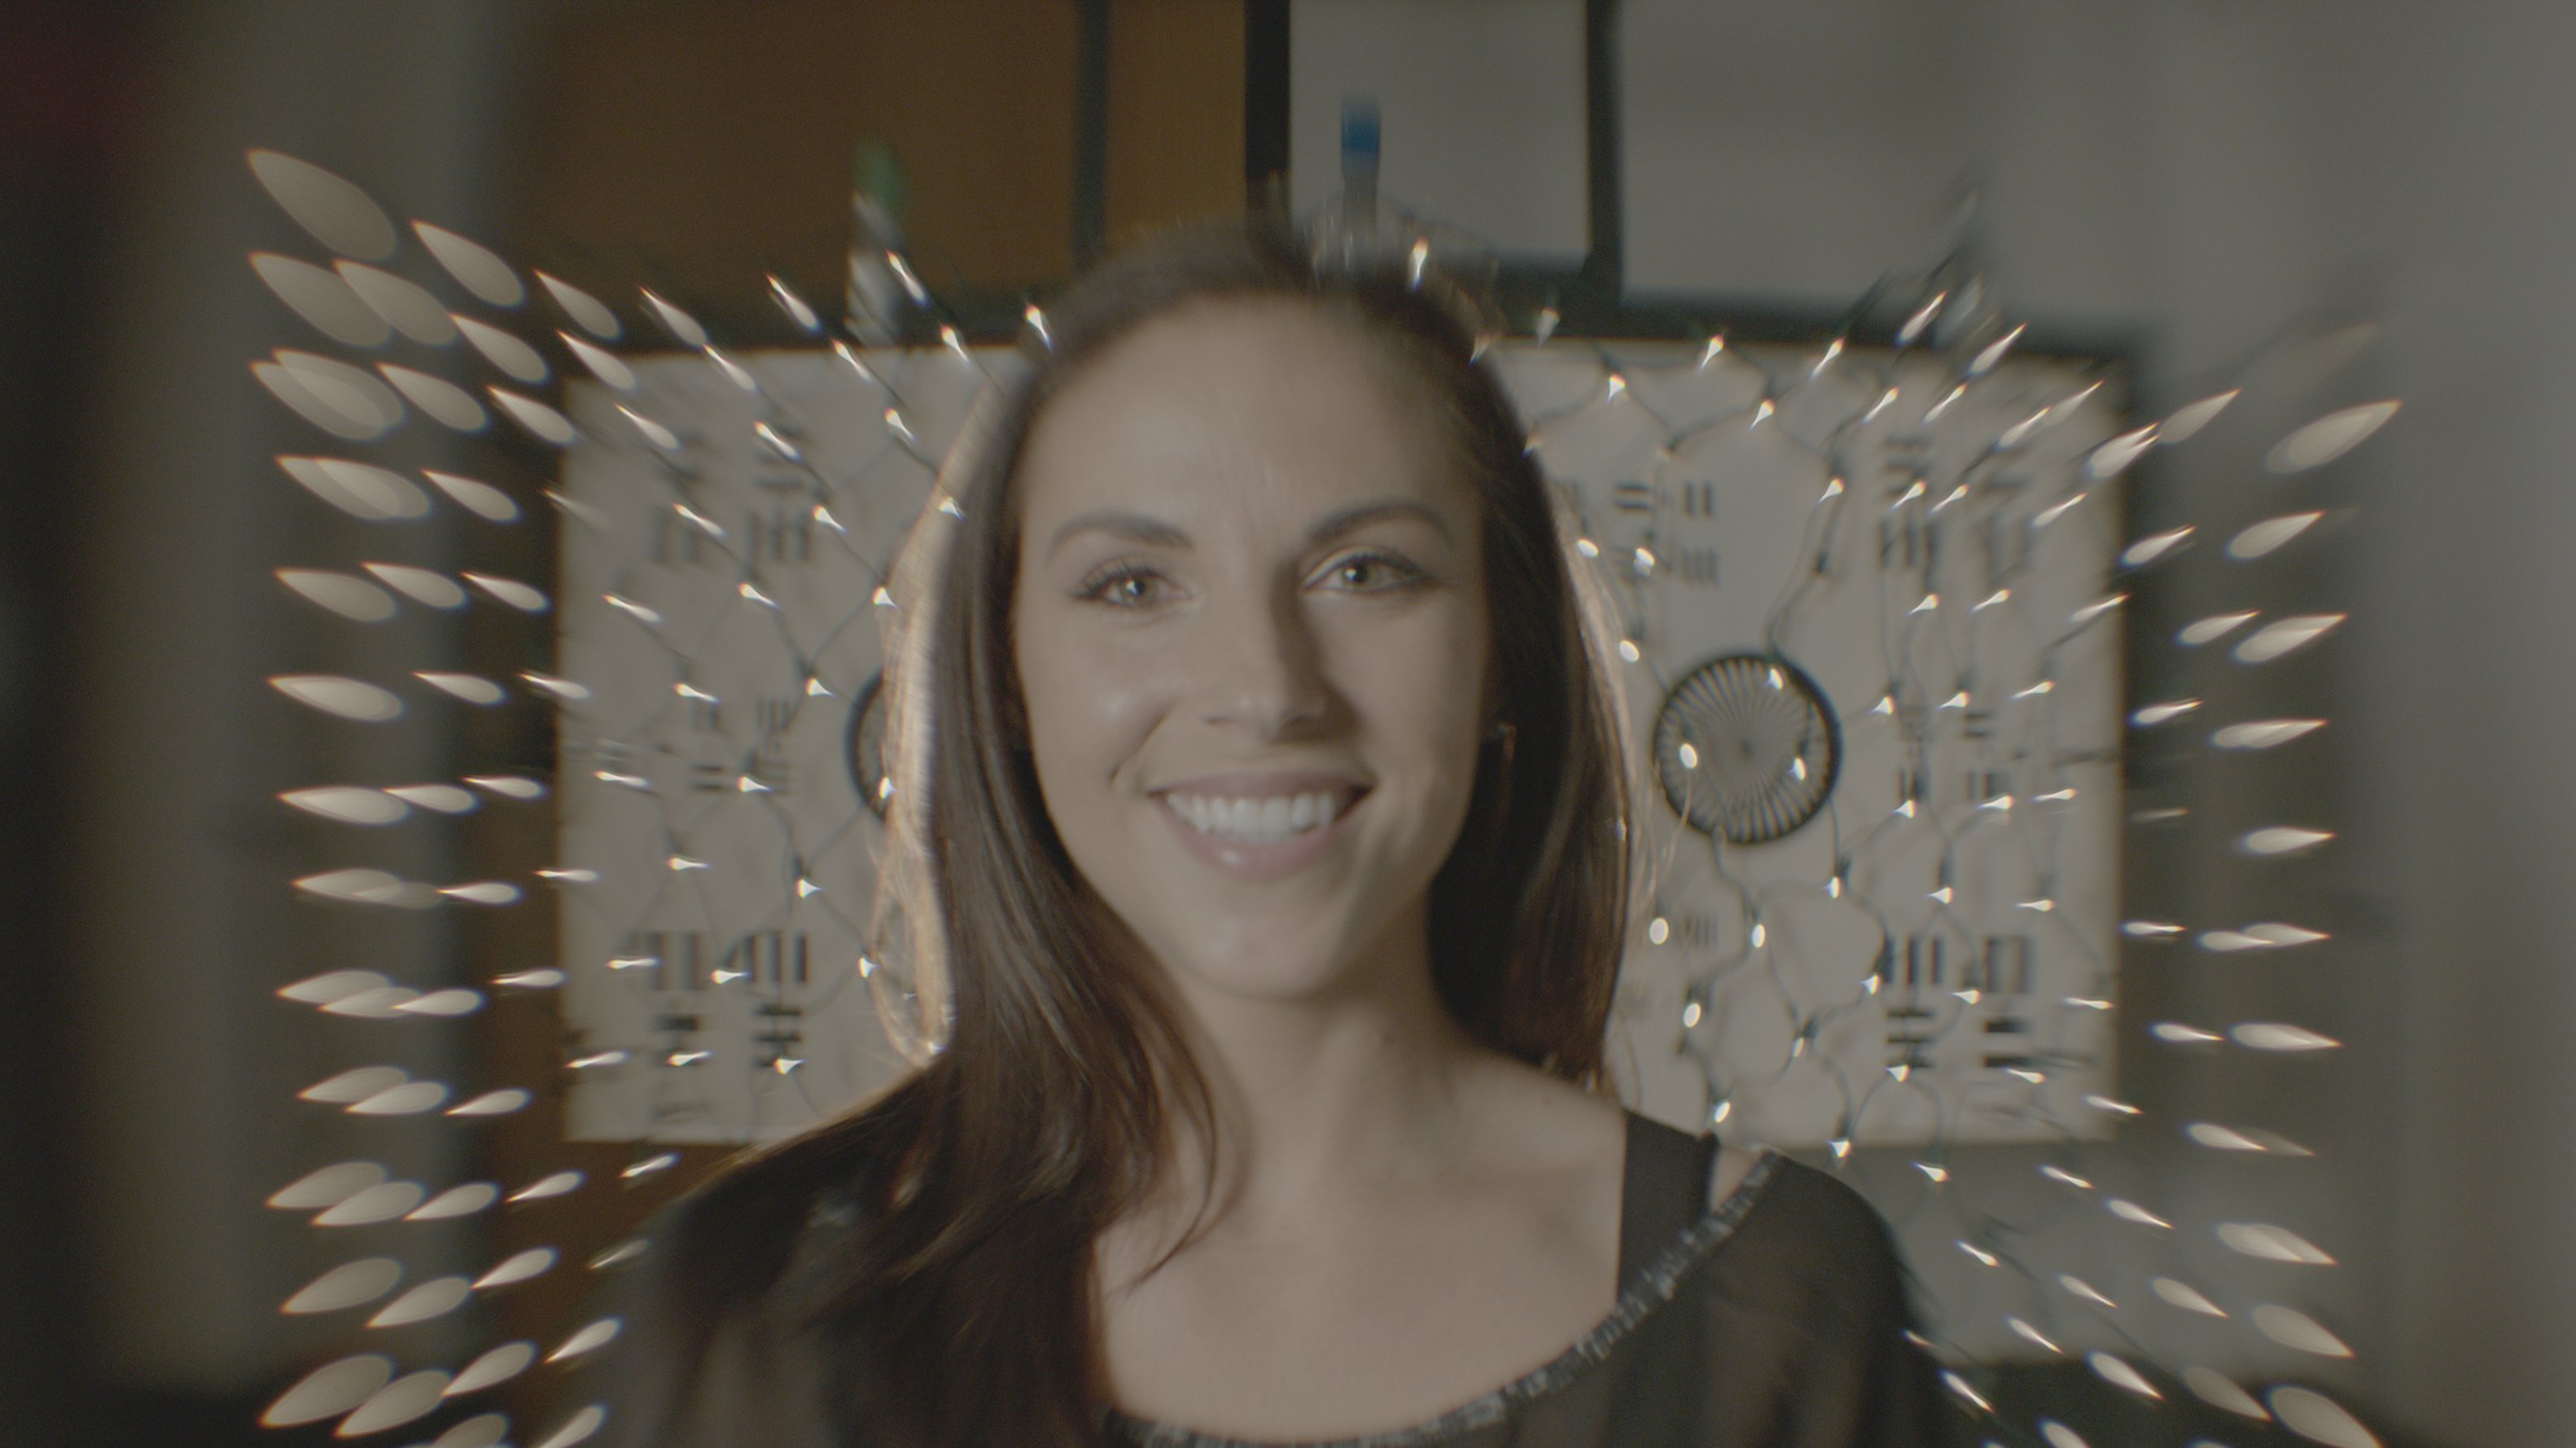
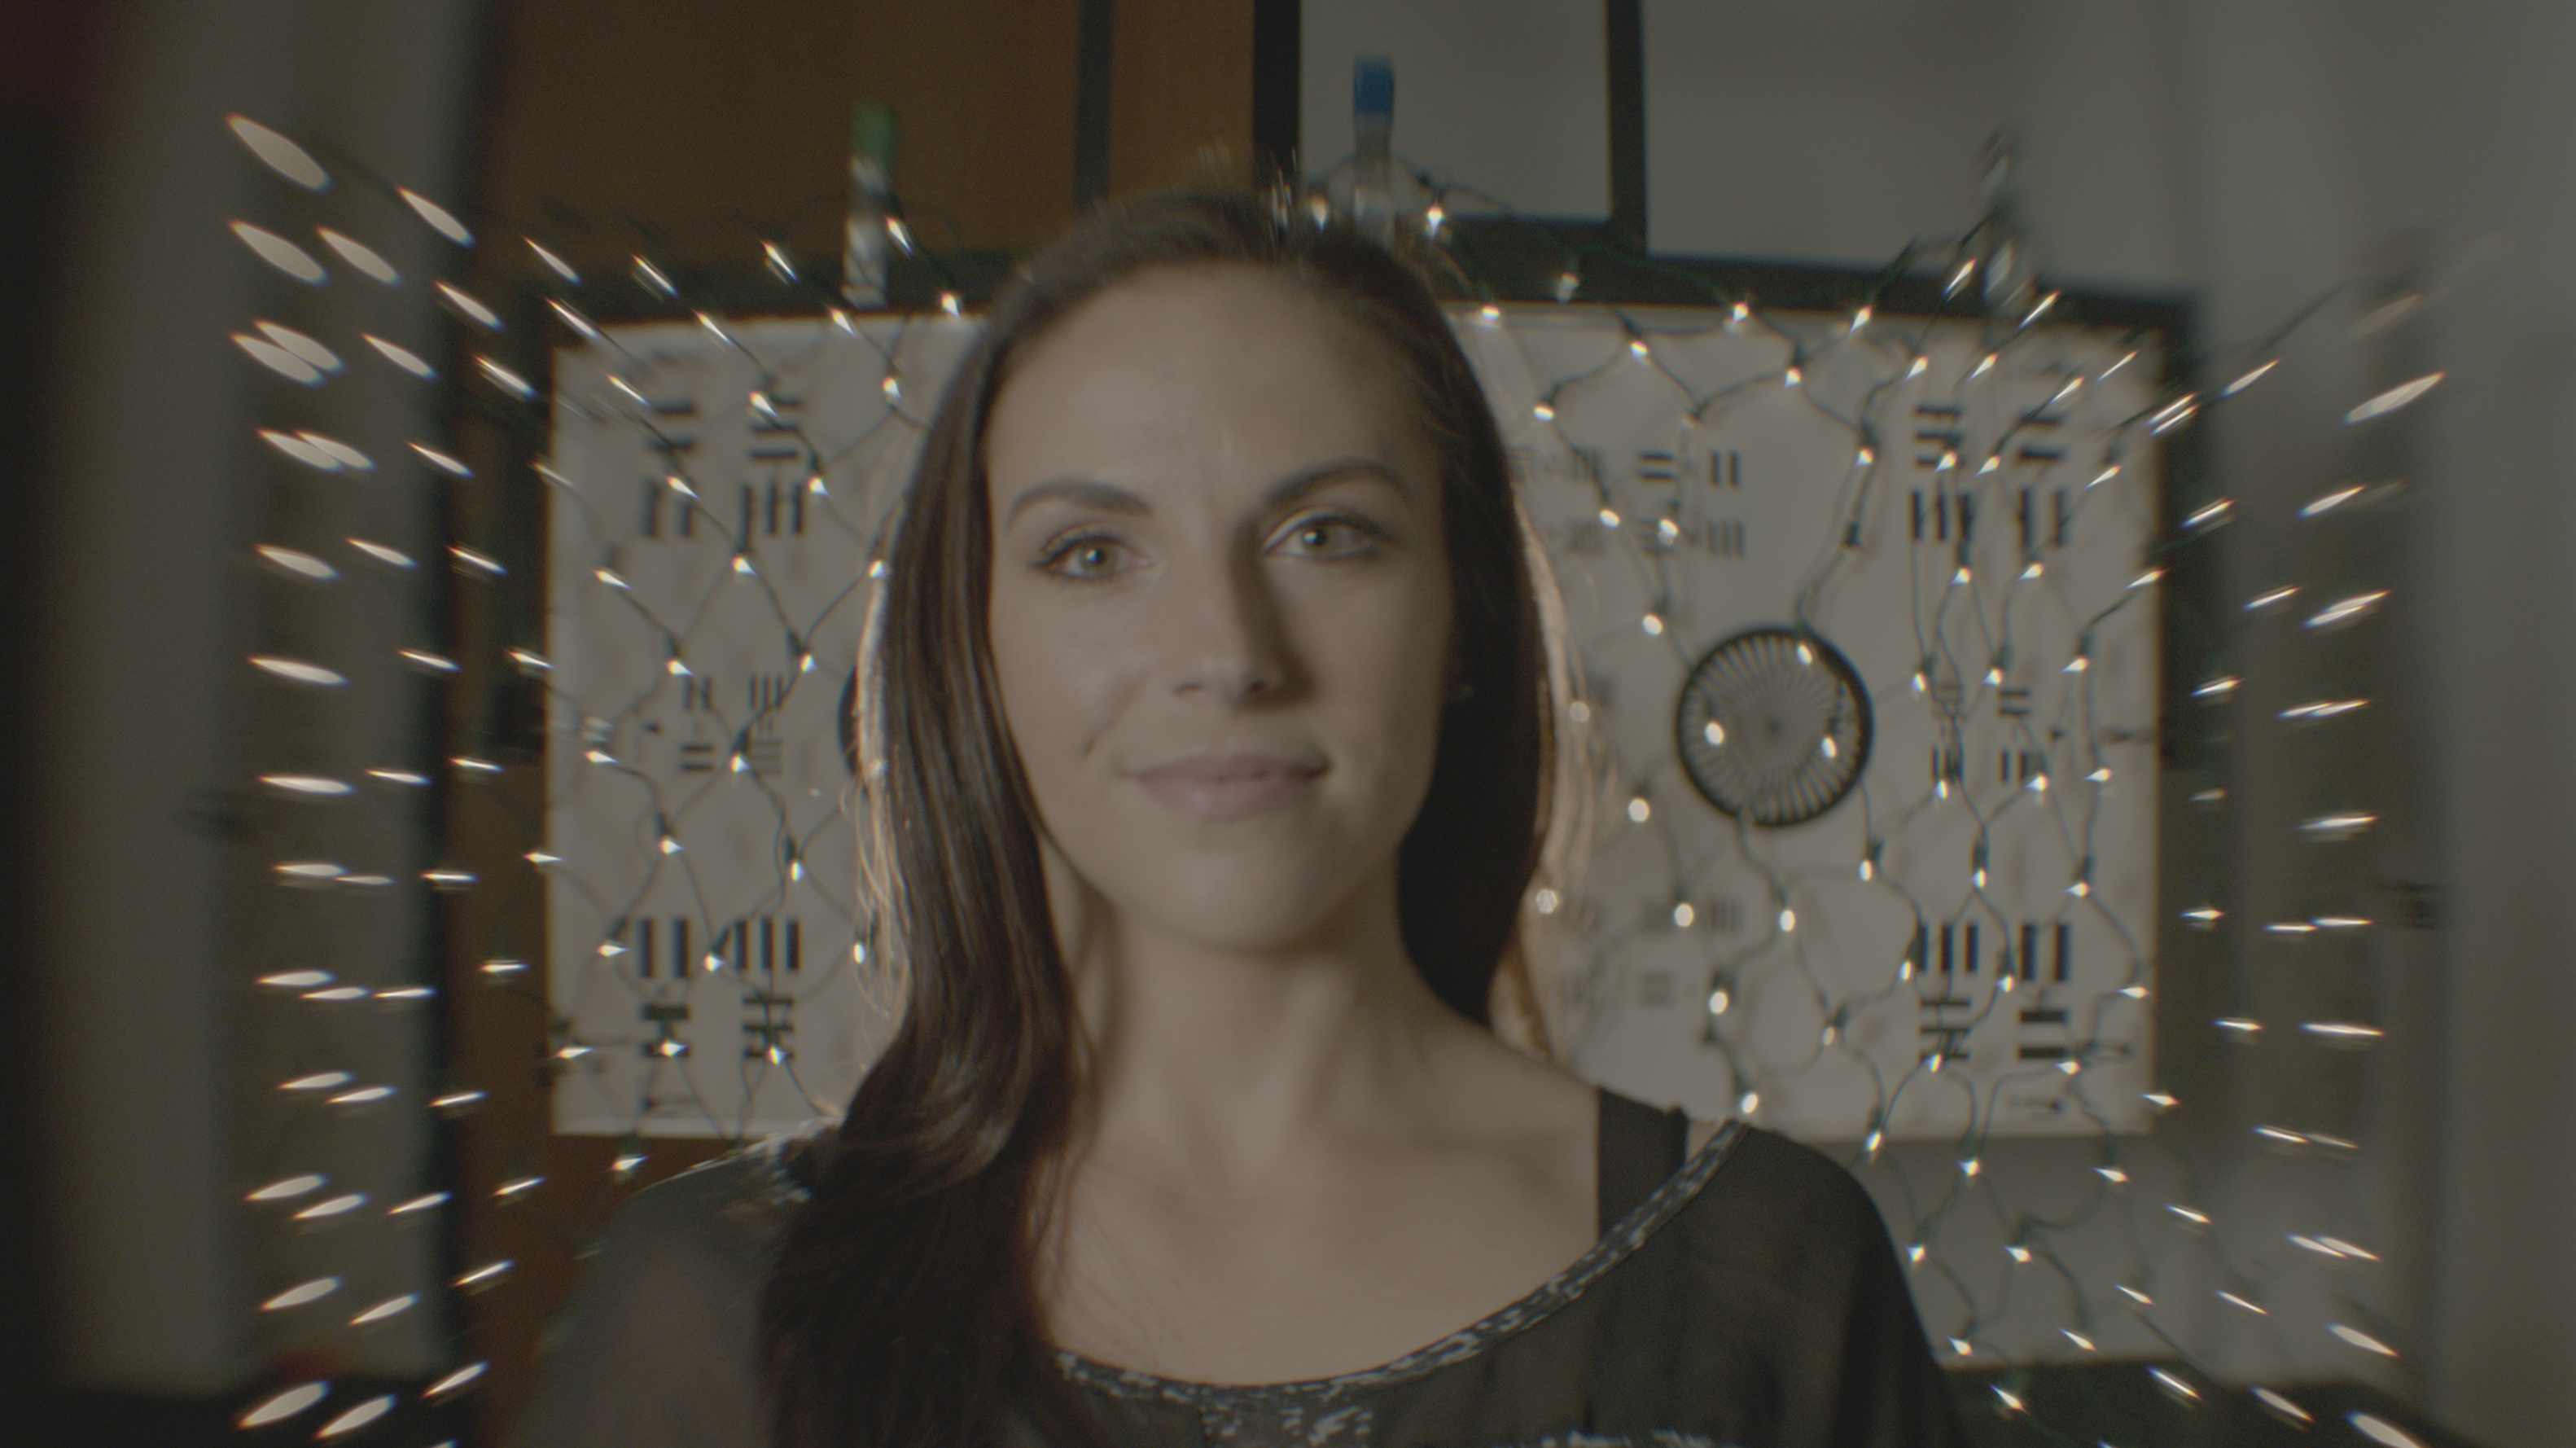
Living and working in Los Angeles, it’s easy enough to walk into Otto Nemenz and ask to view the Deakinizers. But I know that not everyone has that easy accessibility — and I also realized that there was no thorough test or visual demonstration available online to illustrate the beauty of the Deakinizer lenses. So I teamed up with Jay Holben to create a more formal lens test that showcased each combination’s configuration and effect. For each combination, we would show the Deakinizer option alone, then with direct flare, then with veiling glare, then with a pan to show side/edge performance and, finally, with a rack through the full range of focus. When the combination allowed, we also showed the bellows adjustment.
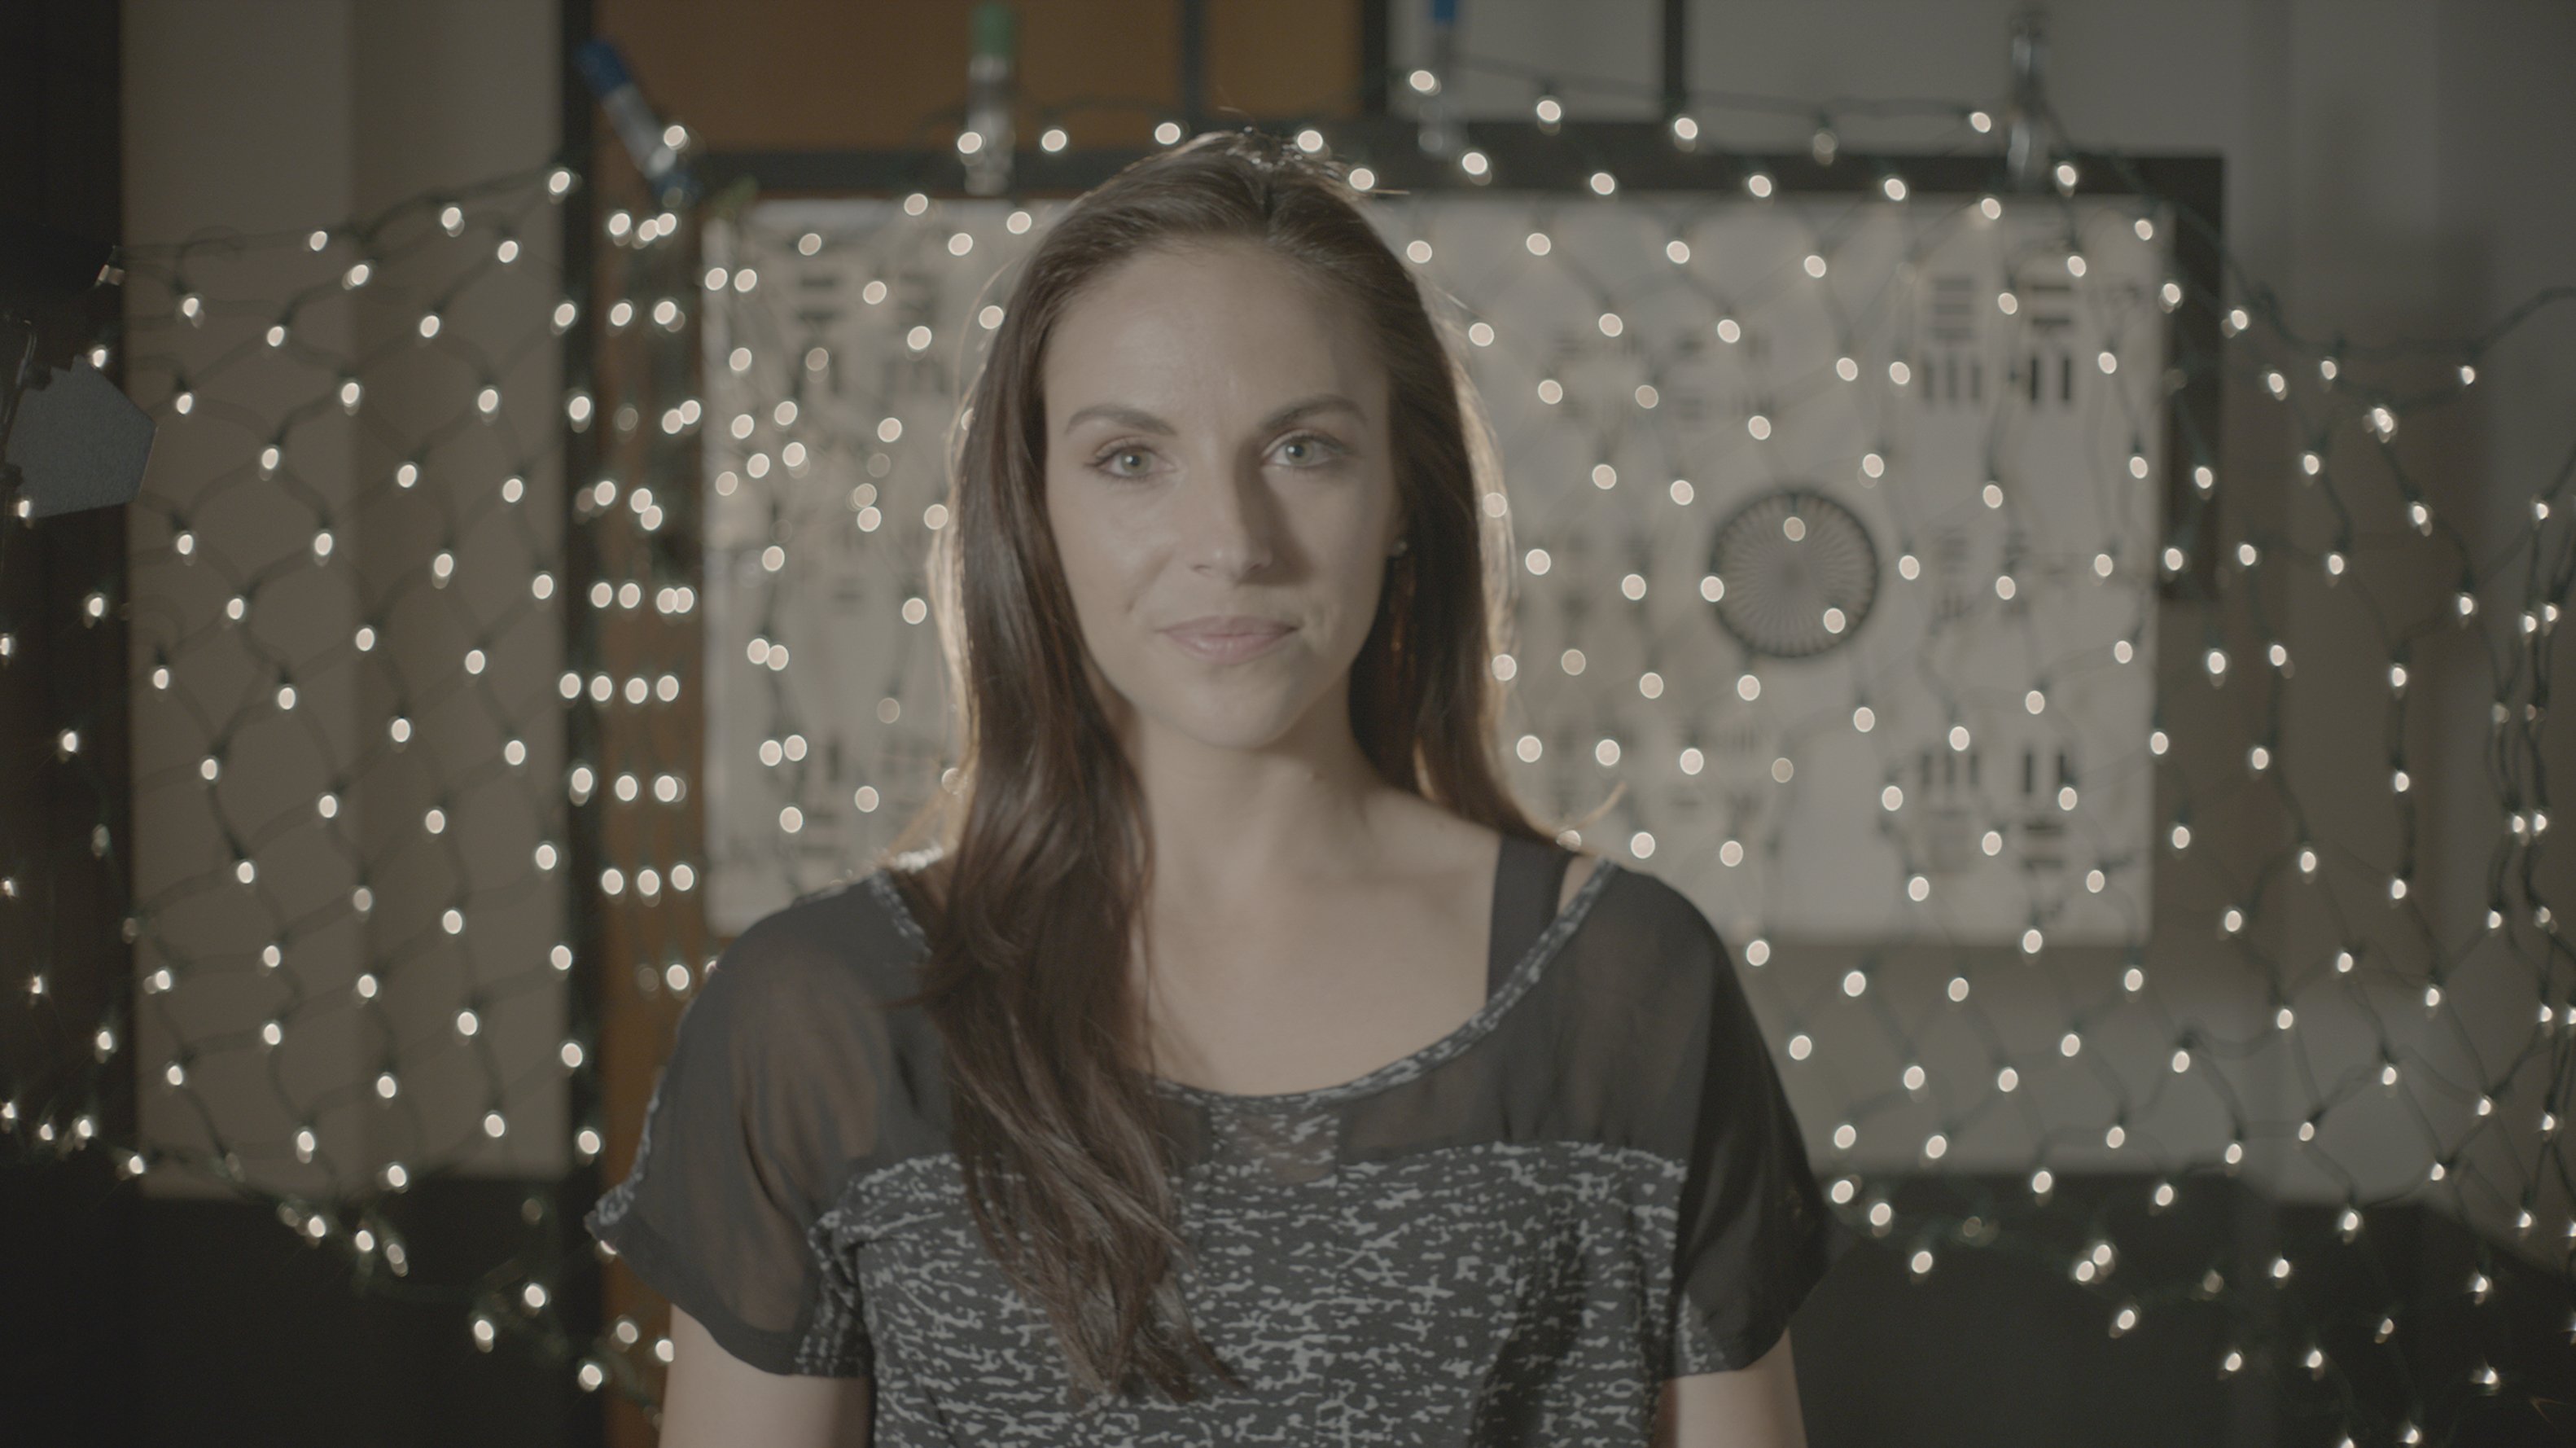
For the test setup, we brought in model Becka Adams and keyed her with a 650-watt Arri tungsten fixture through a medium-bank Chimera. We added a 150-watt Arri behind her head to allow for backlight on her, and — as she leaned to the side — to be a direct flare into the lens. A second 150-watt unit was set off to the side; this would be turned on and off to reveal the lens systems’ ability to handle veiling glare. Finally, we strung Christmas lights in the background so we could study the lenses’ bokeh — a requisite for any lens test.
First, to show how a normal lens would react to this test, we shot an unaltered 32mm Arri Macro before proceeding through each variation of the Deakinizer. The effect is at its most extreme when the lens is wide open, so we shot each Deakinizer combination at its widest stop. We then stopped the lens down about two stops to show a less intense variation.
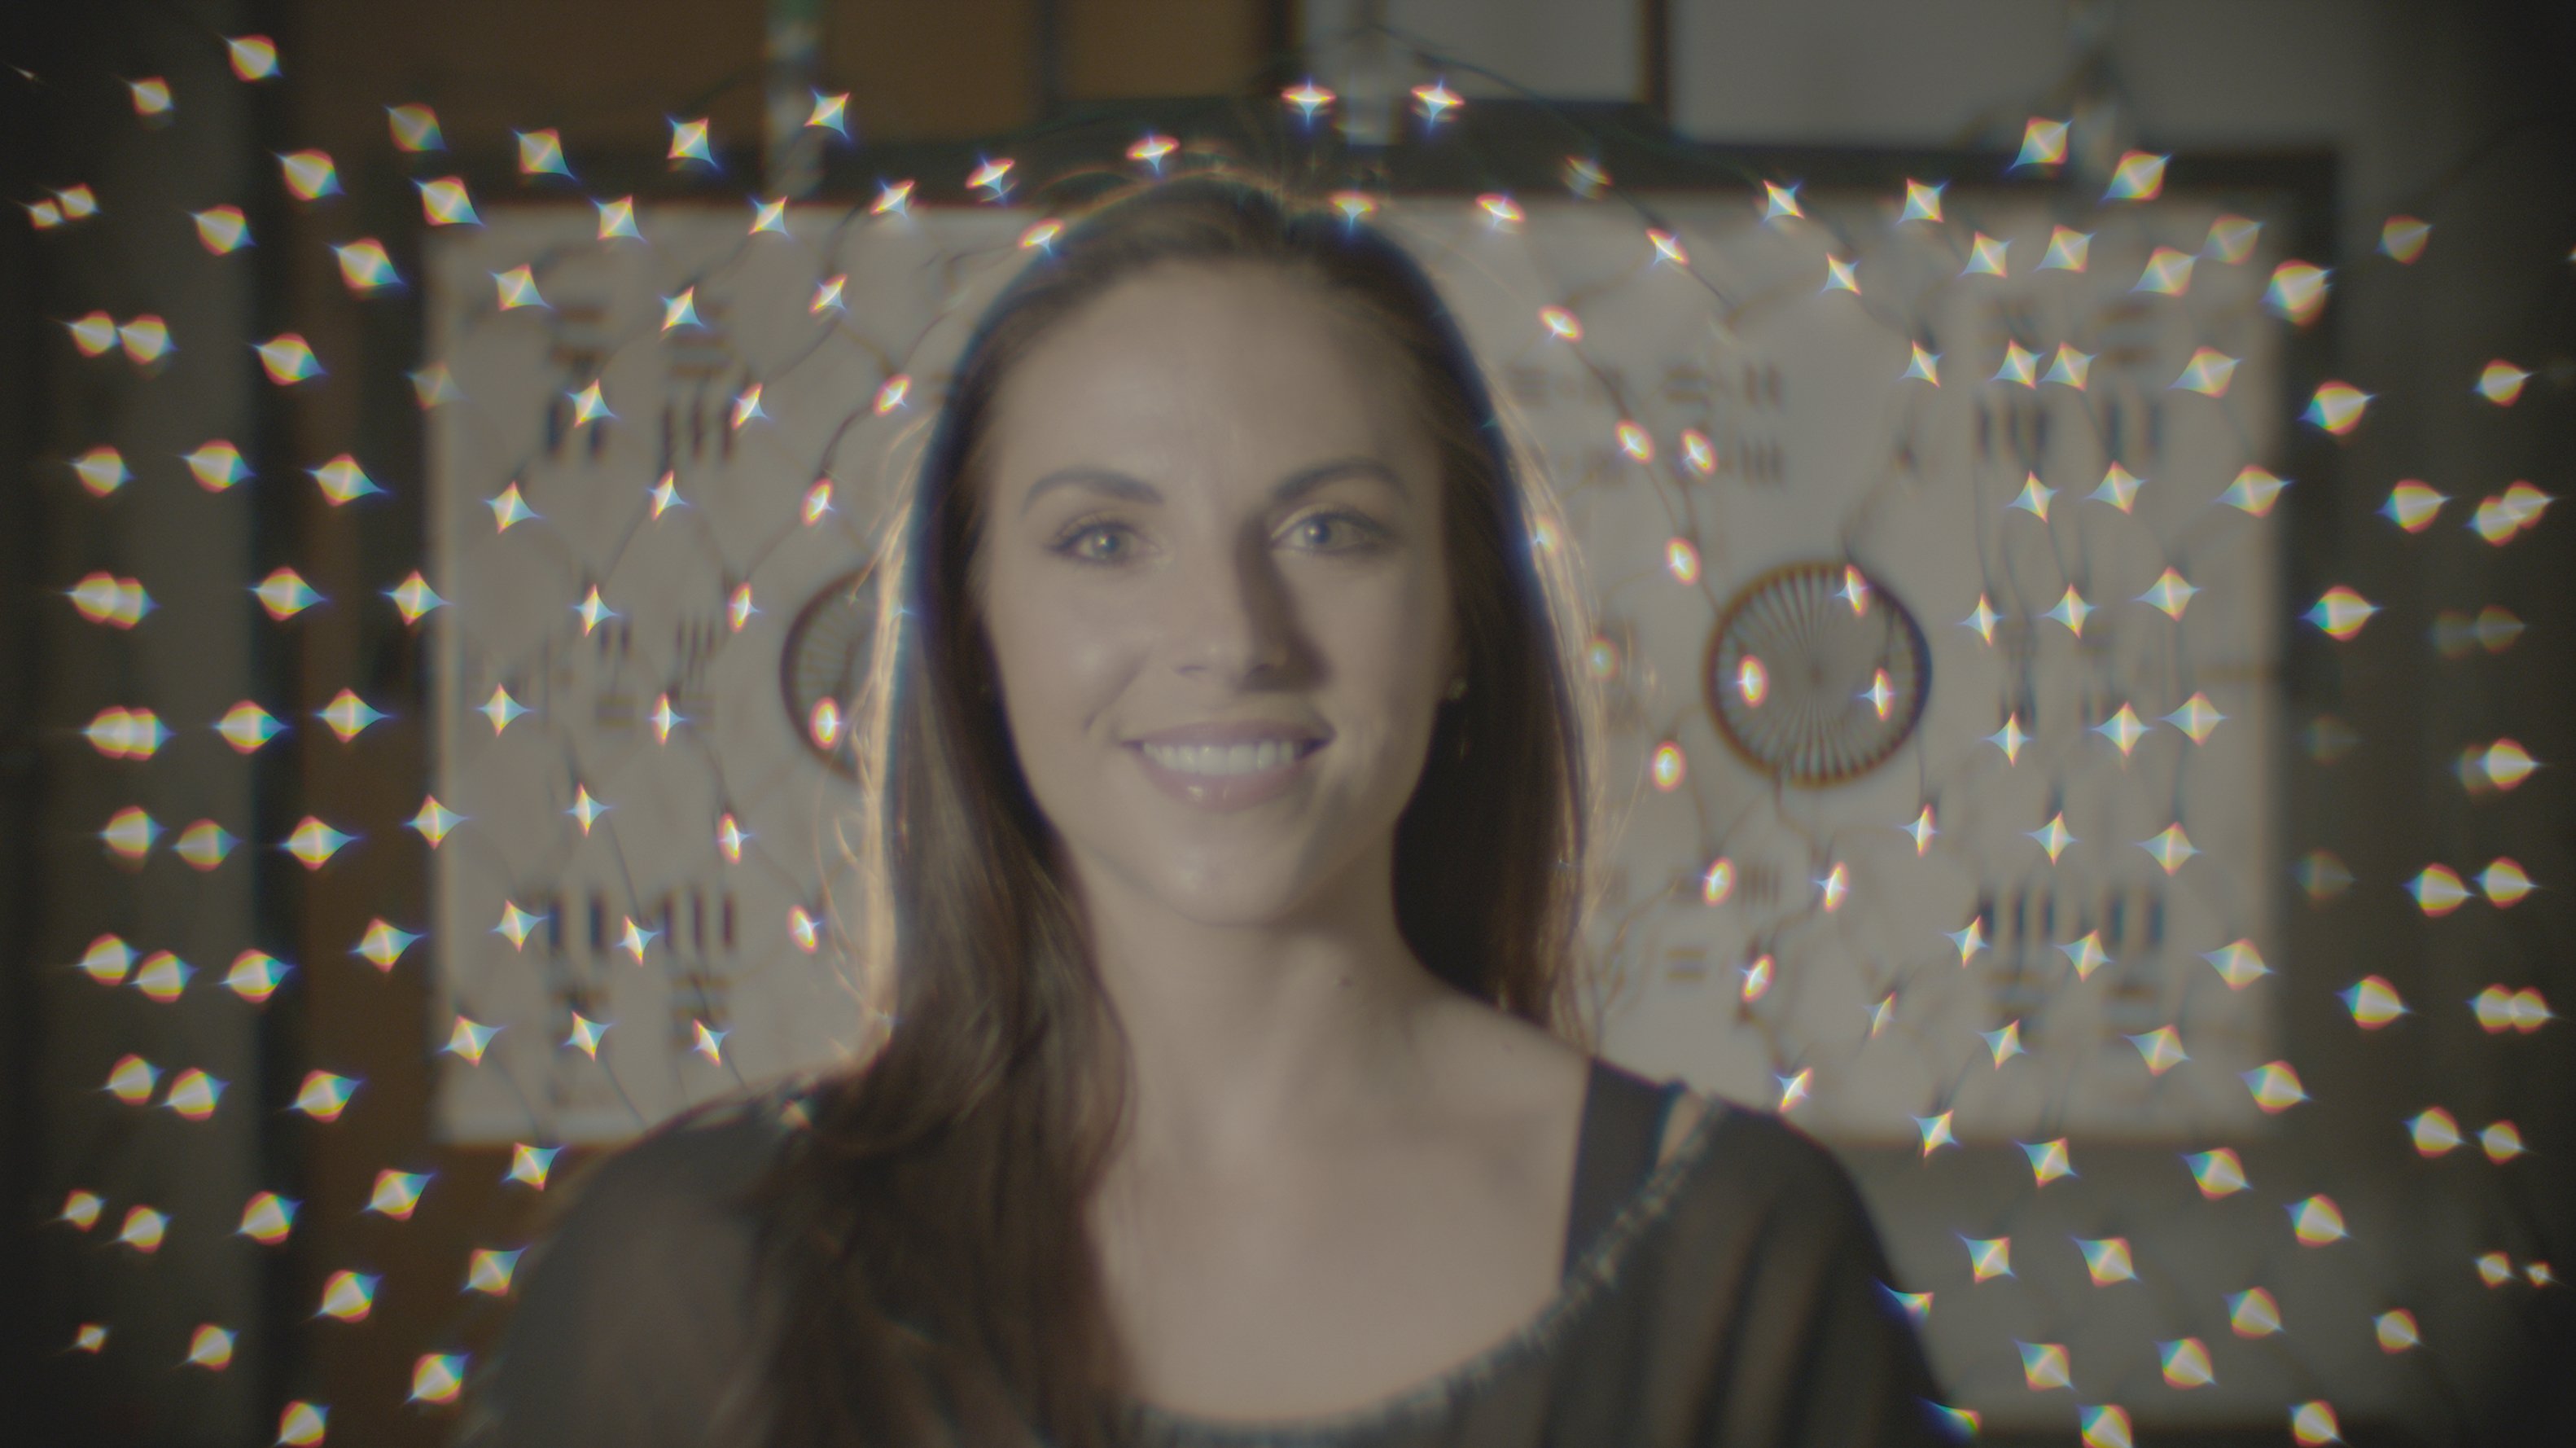
After completing the standard test, we followed a suggestion from Lopez — Otto’s resident lens guru — and we went outside. Lopez had proposed that we simply shoot a tree, filling the frame with the foliage. While this seemed like a somewhat random suggestion, we soon realized how the backlit leaves beautifully revealed the dreamy quality of the Deakinizers.
For this outside portion of our test, we started with an unaltered 50mm Arri Macro as a control to show us how a normal lens would react. Frankly, I was unimpressed and wondered what we were doing outside — it was just a boring shot of a tree. However, as soon as we put the Deakinizer effect into play, it was incredible to see how much more interesting the shot of the tree became! It turns out that the best way to see the full capability of these specialty lenses is by filling the frame with a texture or pattern, as this really shows the blur and distortion around the edges. To see the distortion and make the most of the effect, you really need something along the edges of the frame.


This entire experience has been fascinating. I found it deeply enlightening to see how these lenses could be manipulated and altered to achieve different looks. The Deakinizers provoke emotions you can’t easily achieve with a normal lens. It was a pleasure to see these optics in person and be able to spend some time with them. And I hope our lens test will allow others to see and understand the characteristics of these altered optics — and to imagine the creative opportunities they present.
The Deakinizer lenses are available to rent at Otto Nemenz International in Los Angeles.